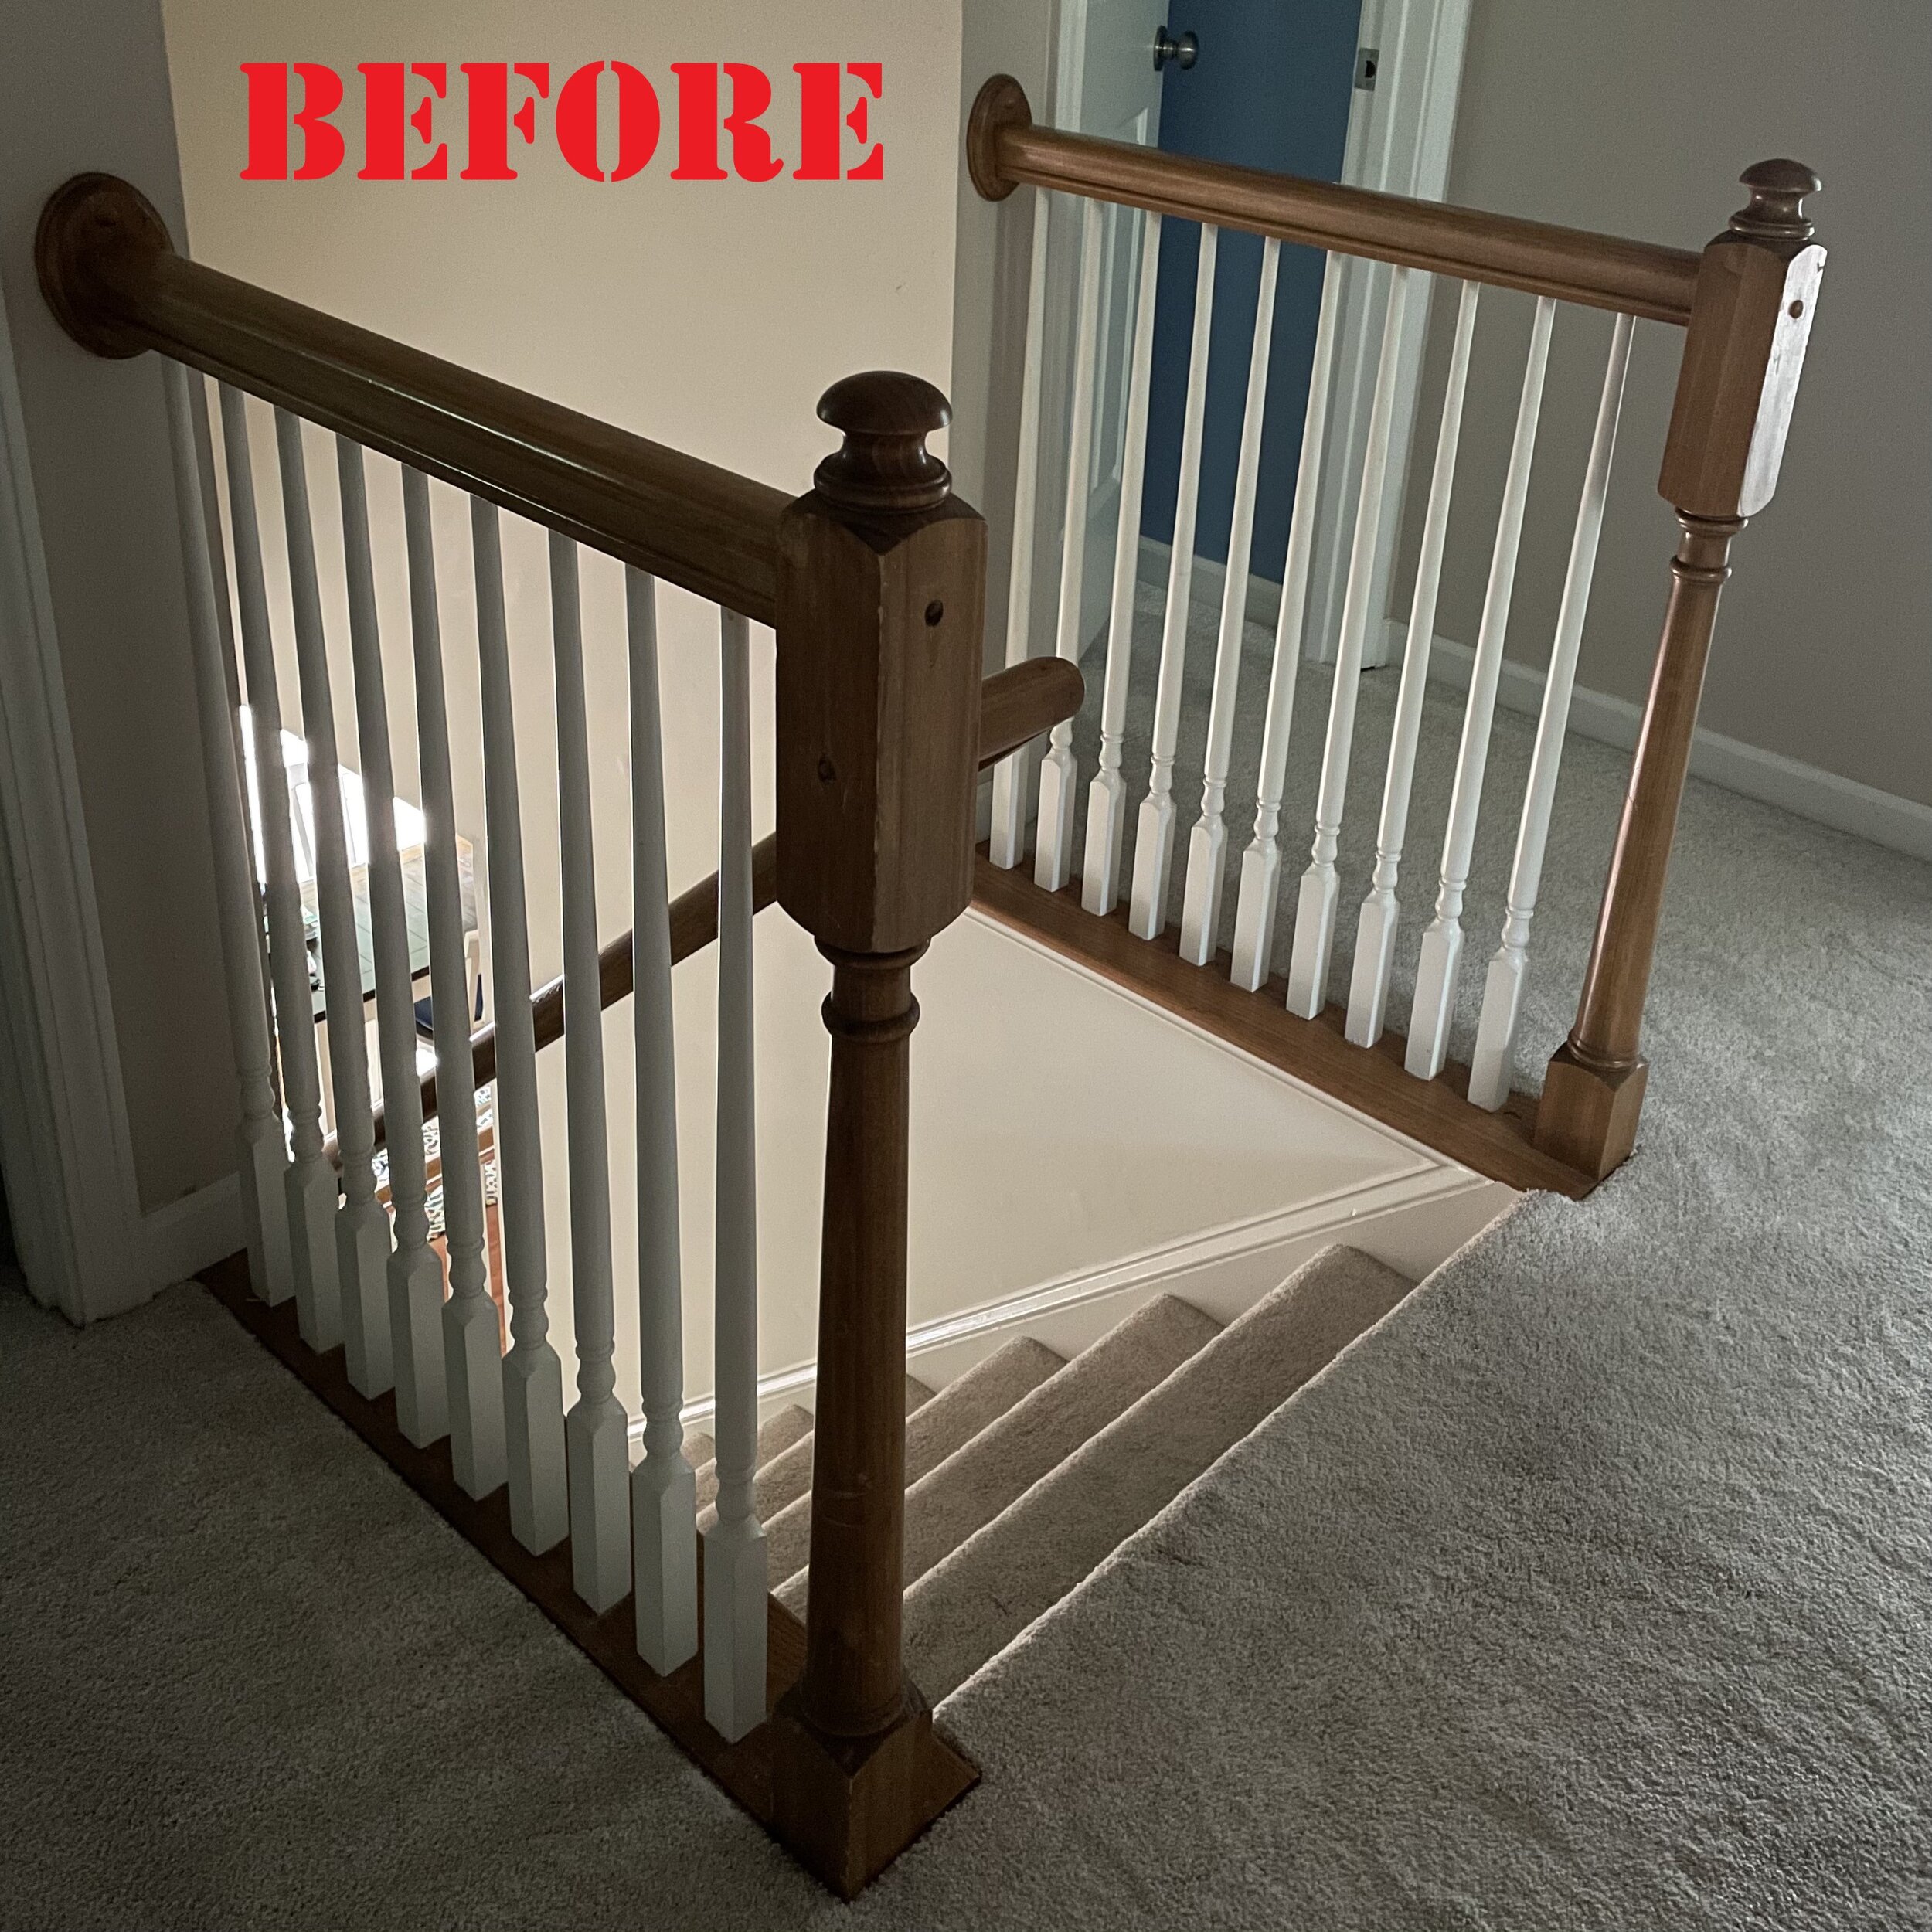
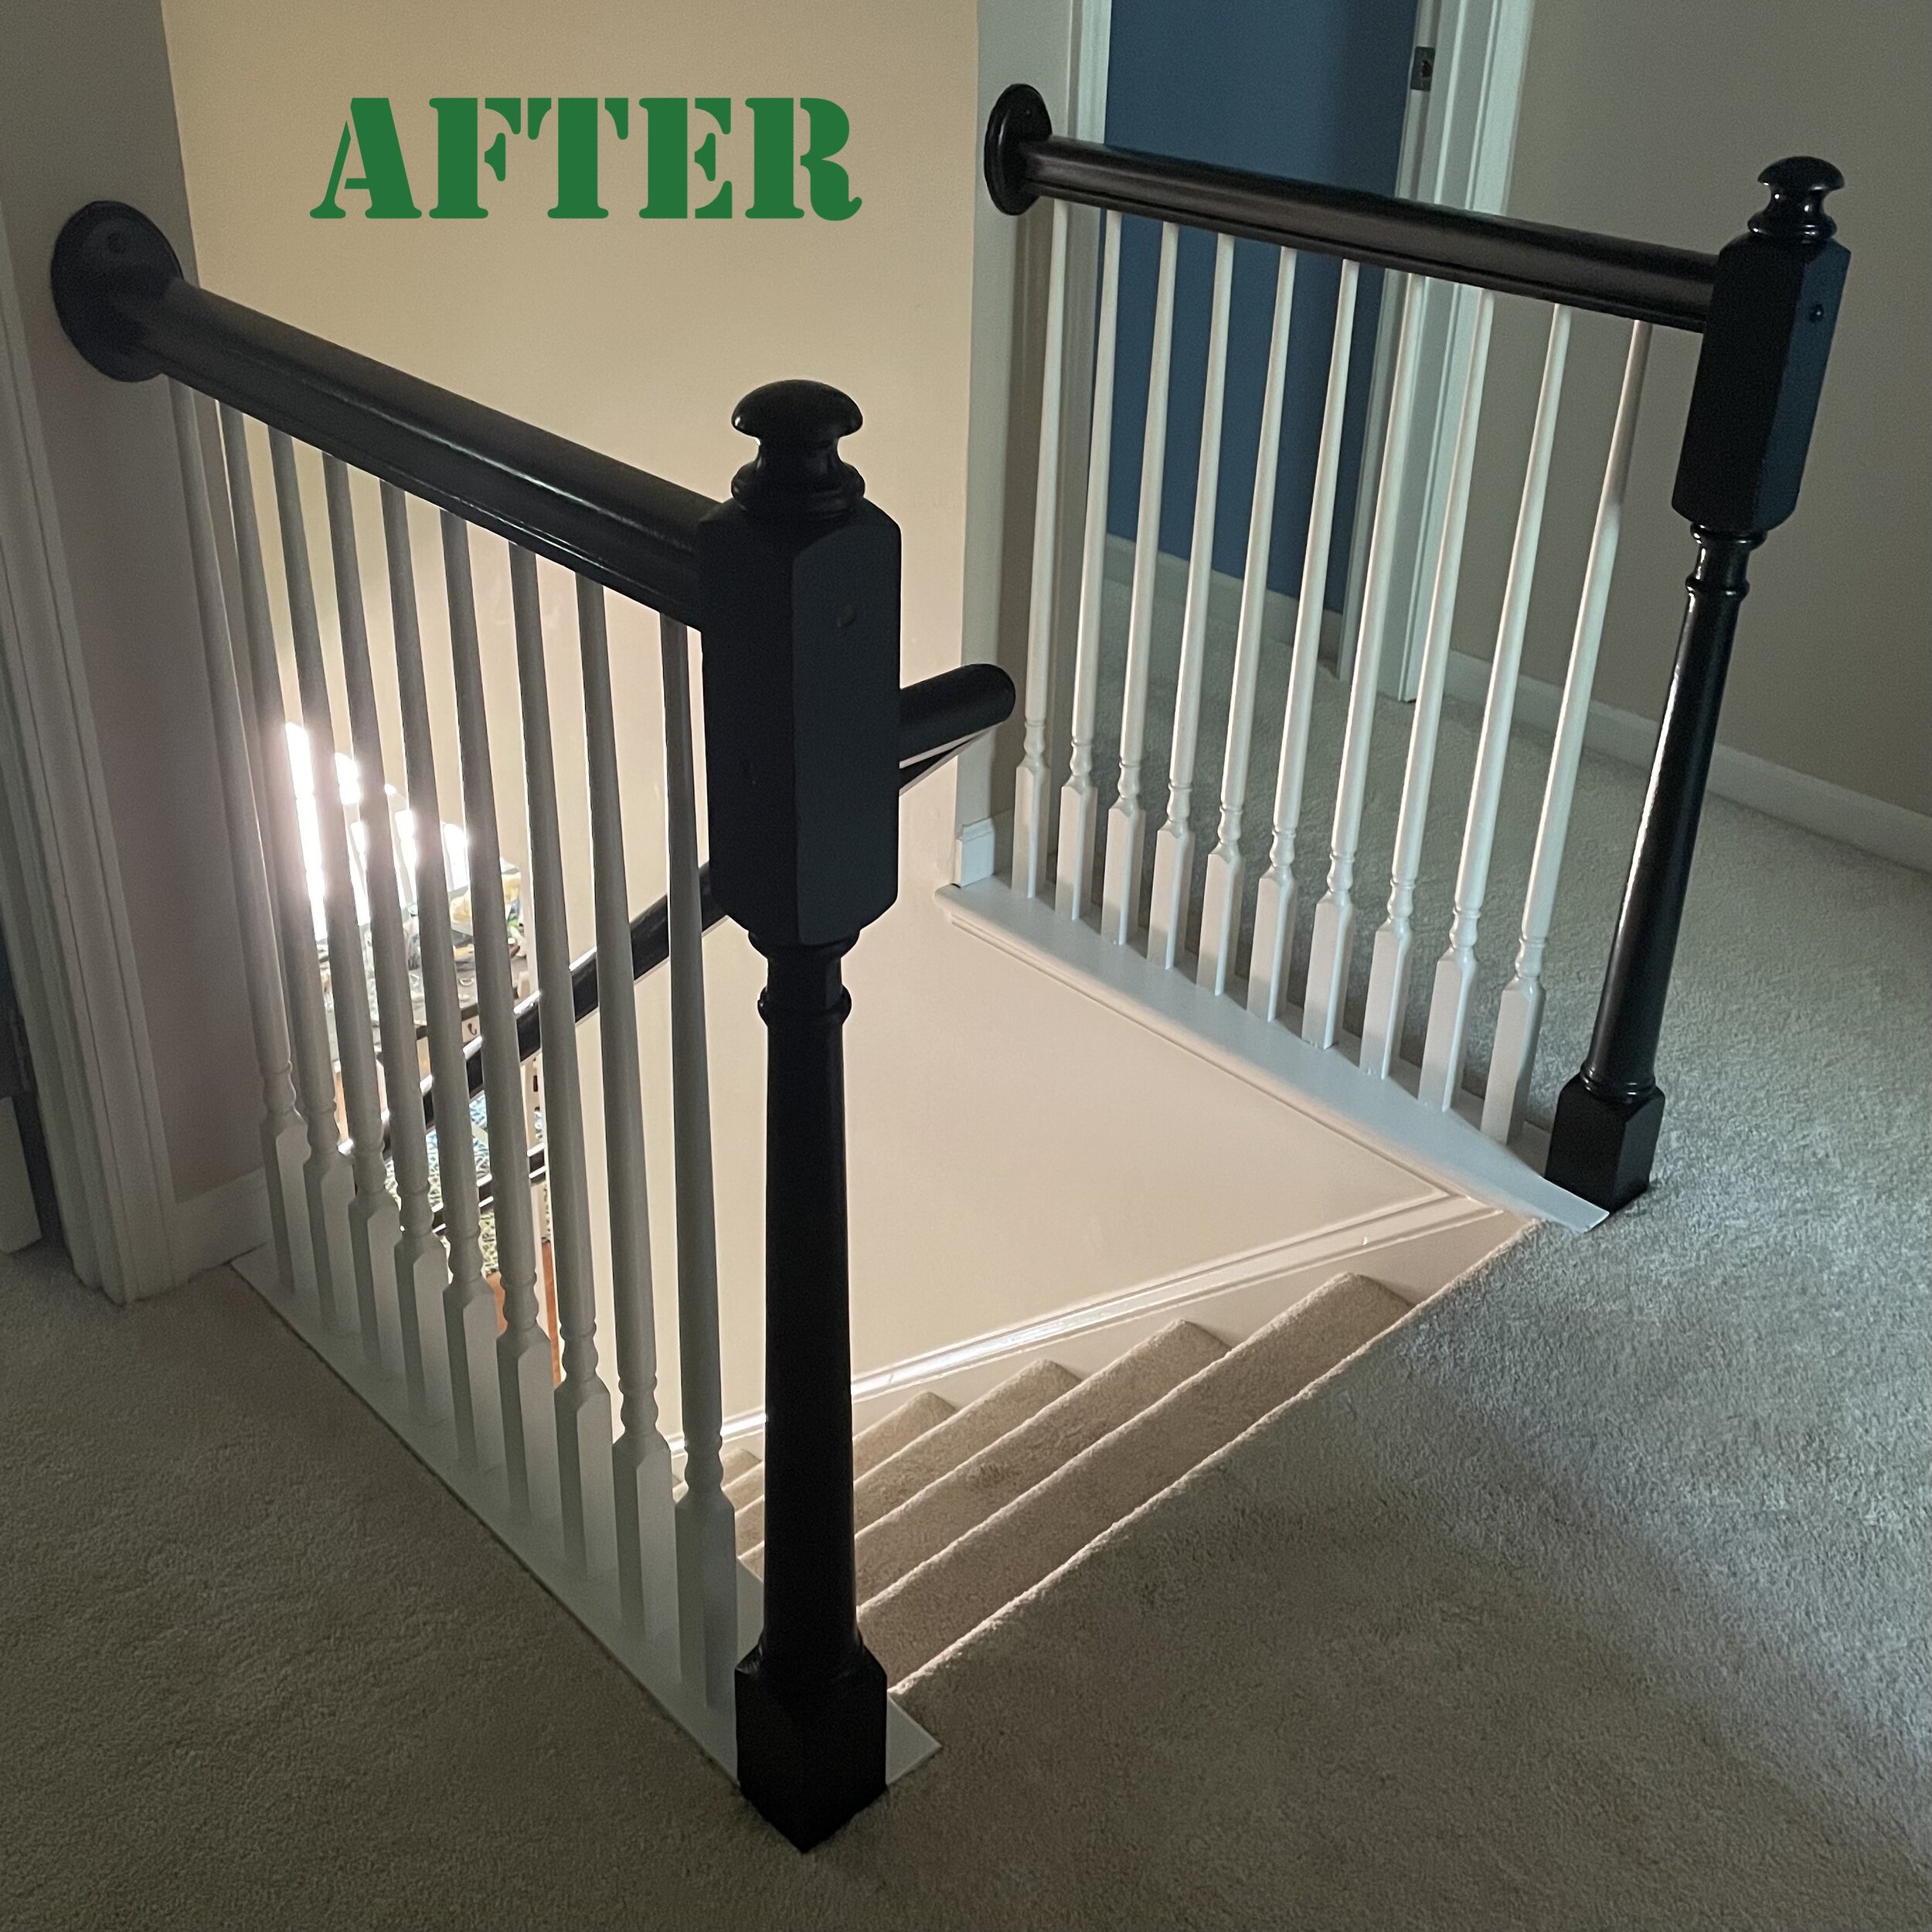
How to Transform Your Oak Staircase

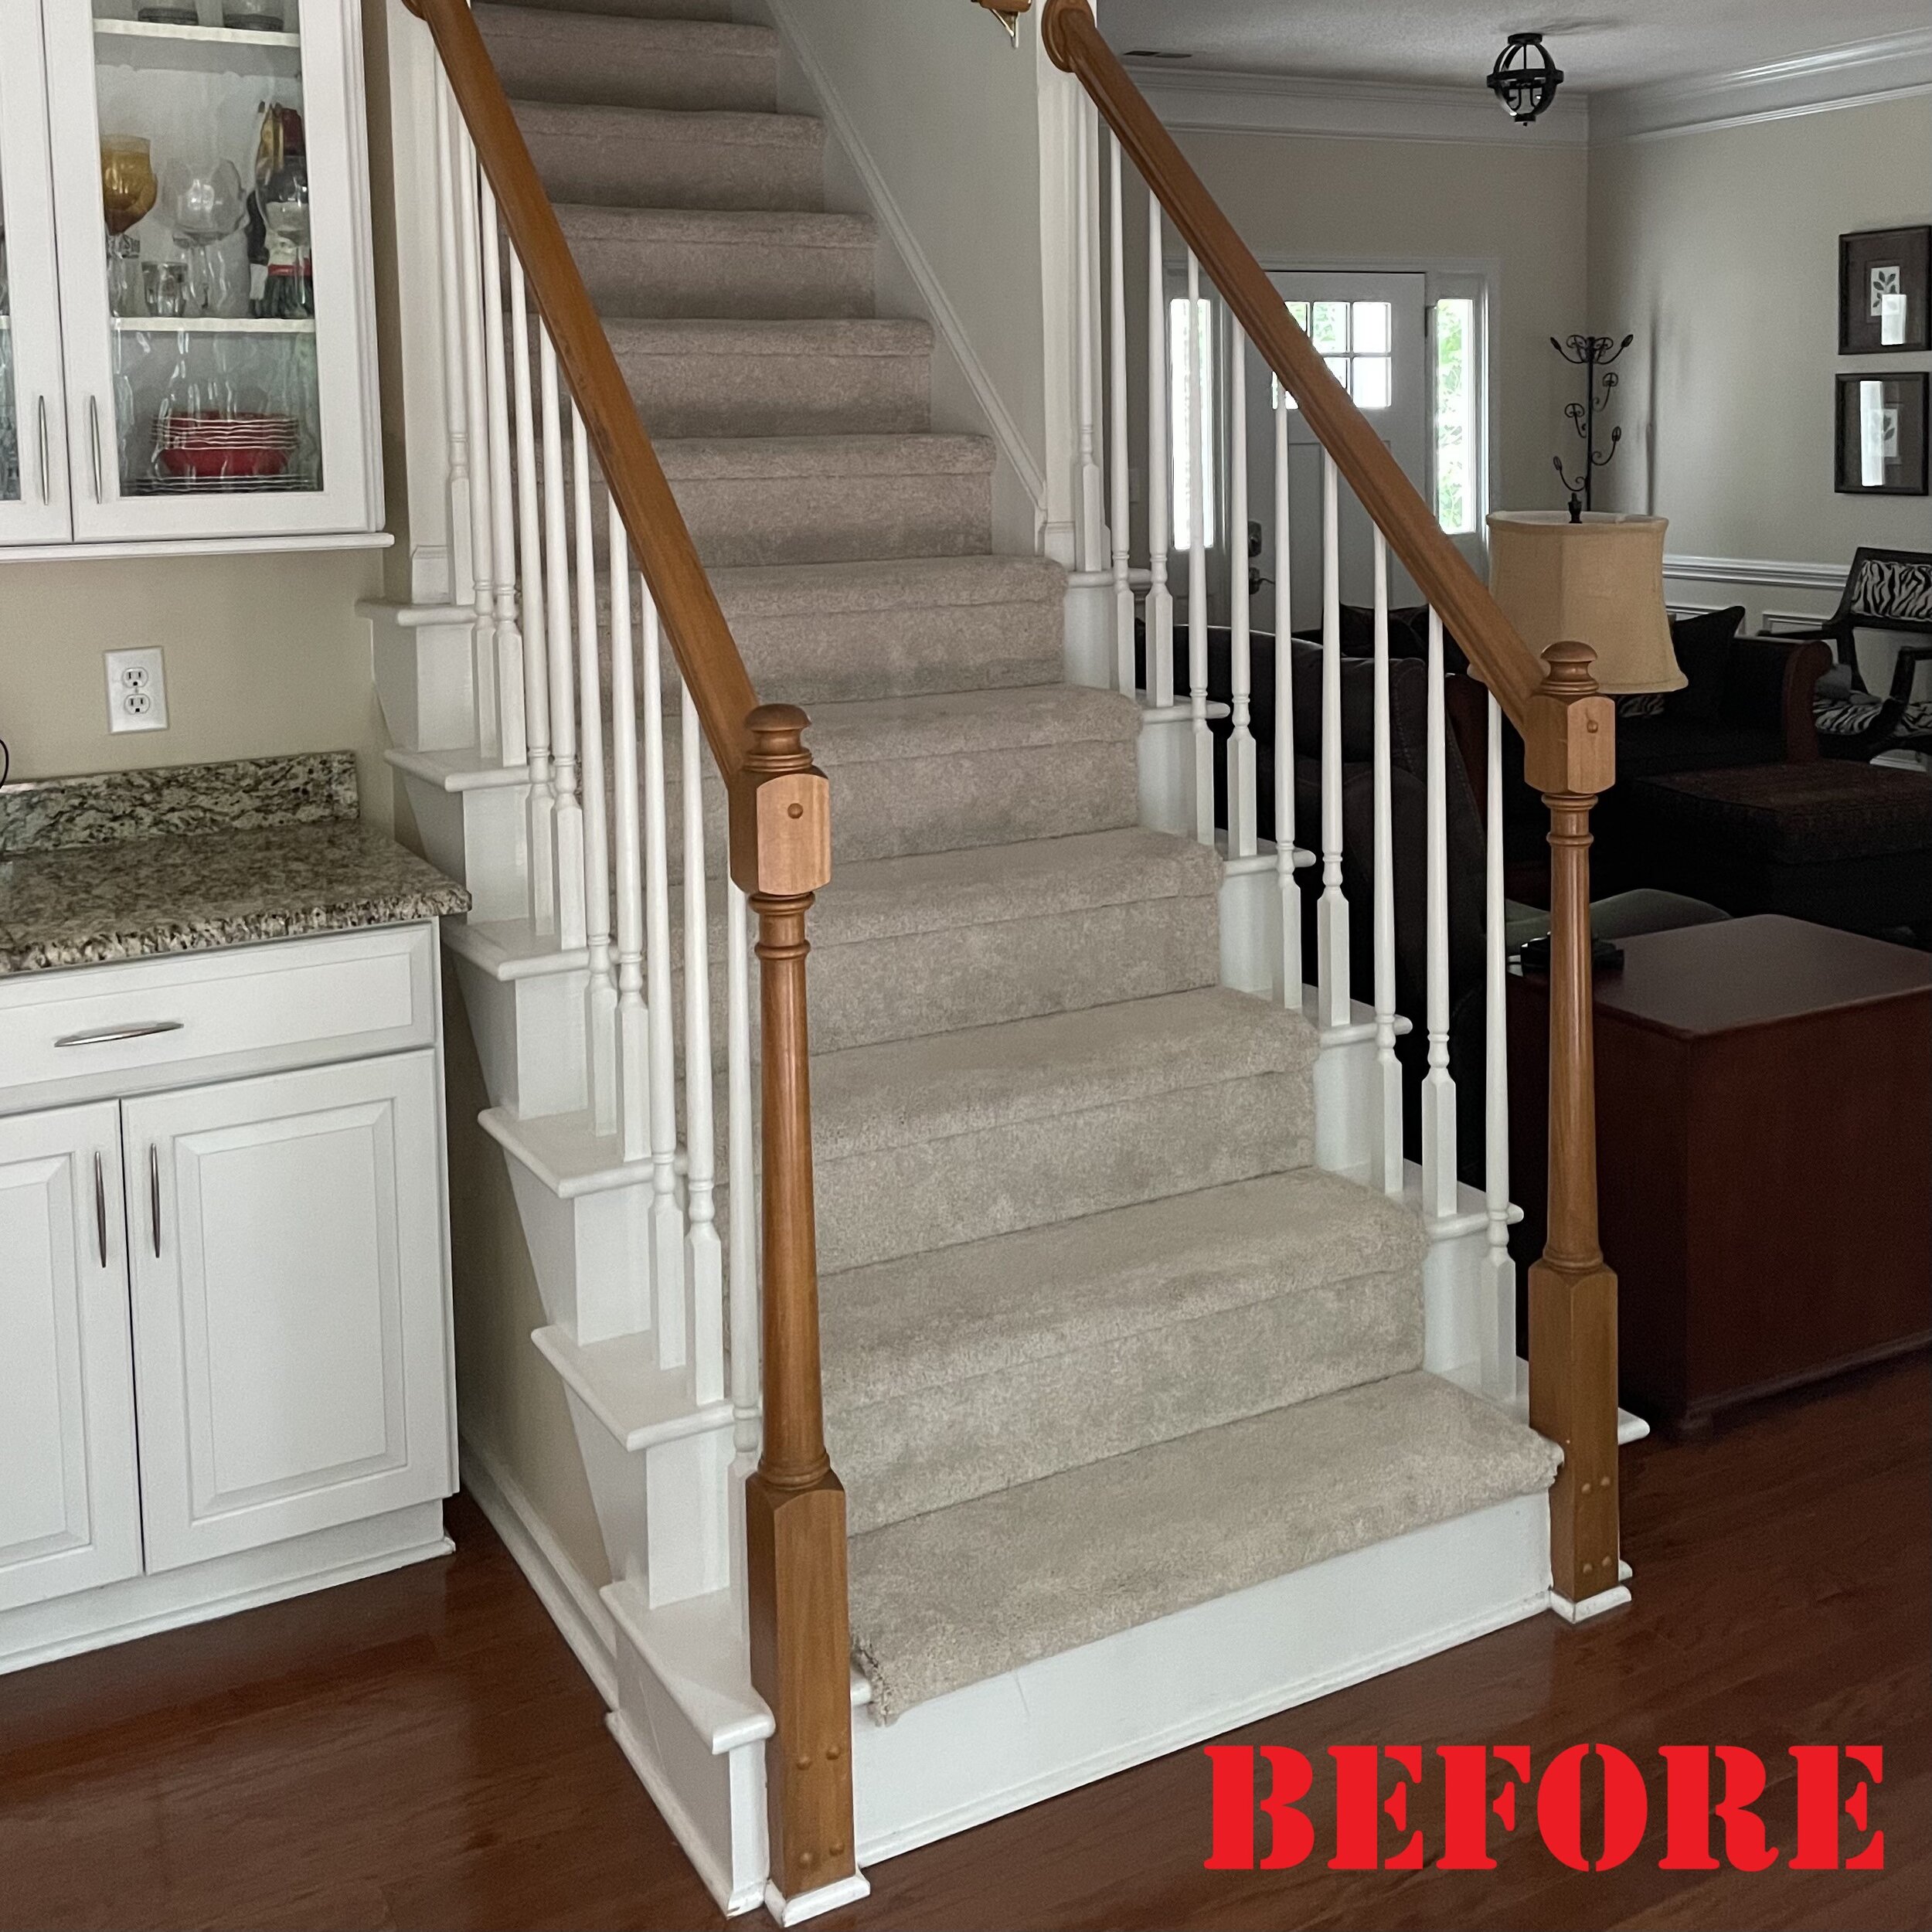
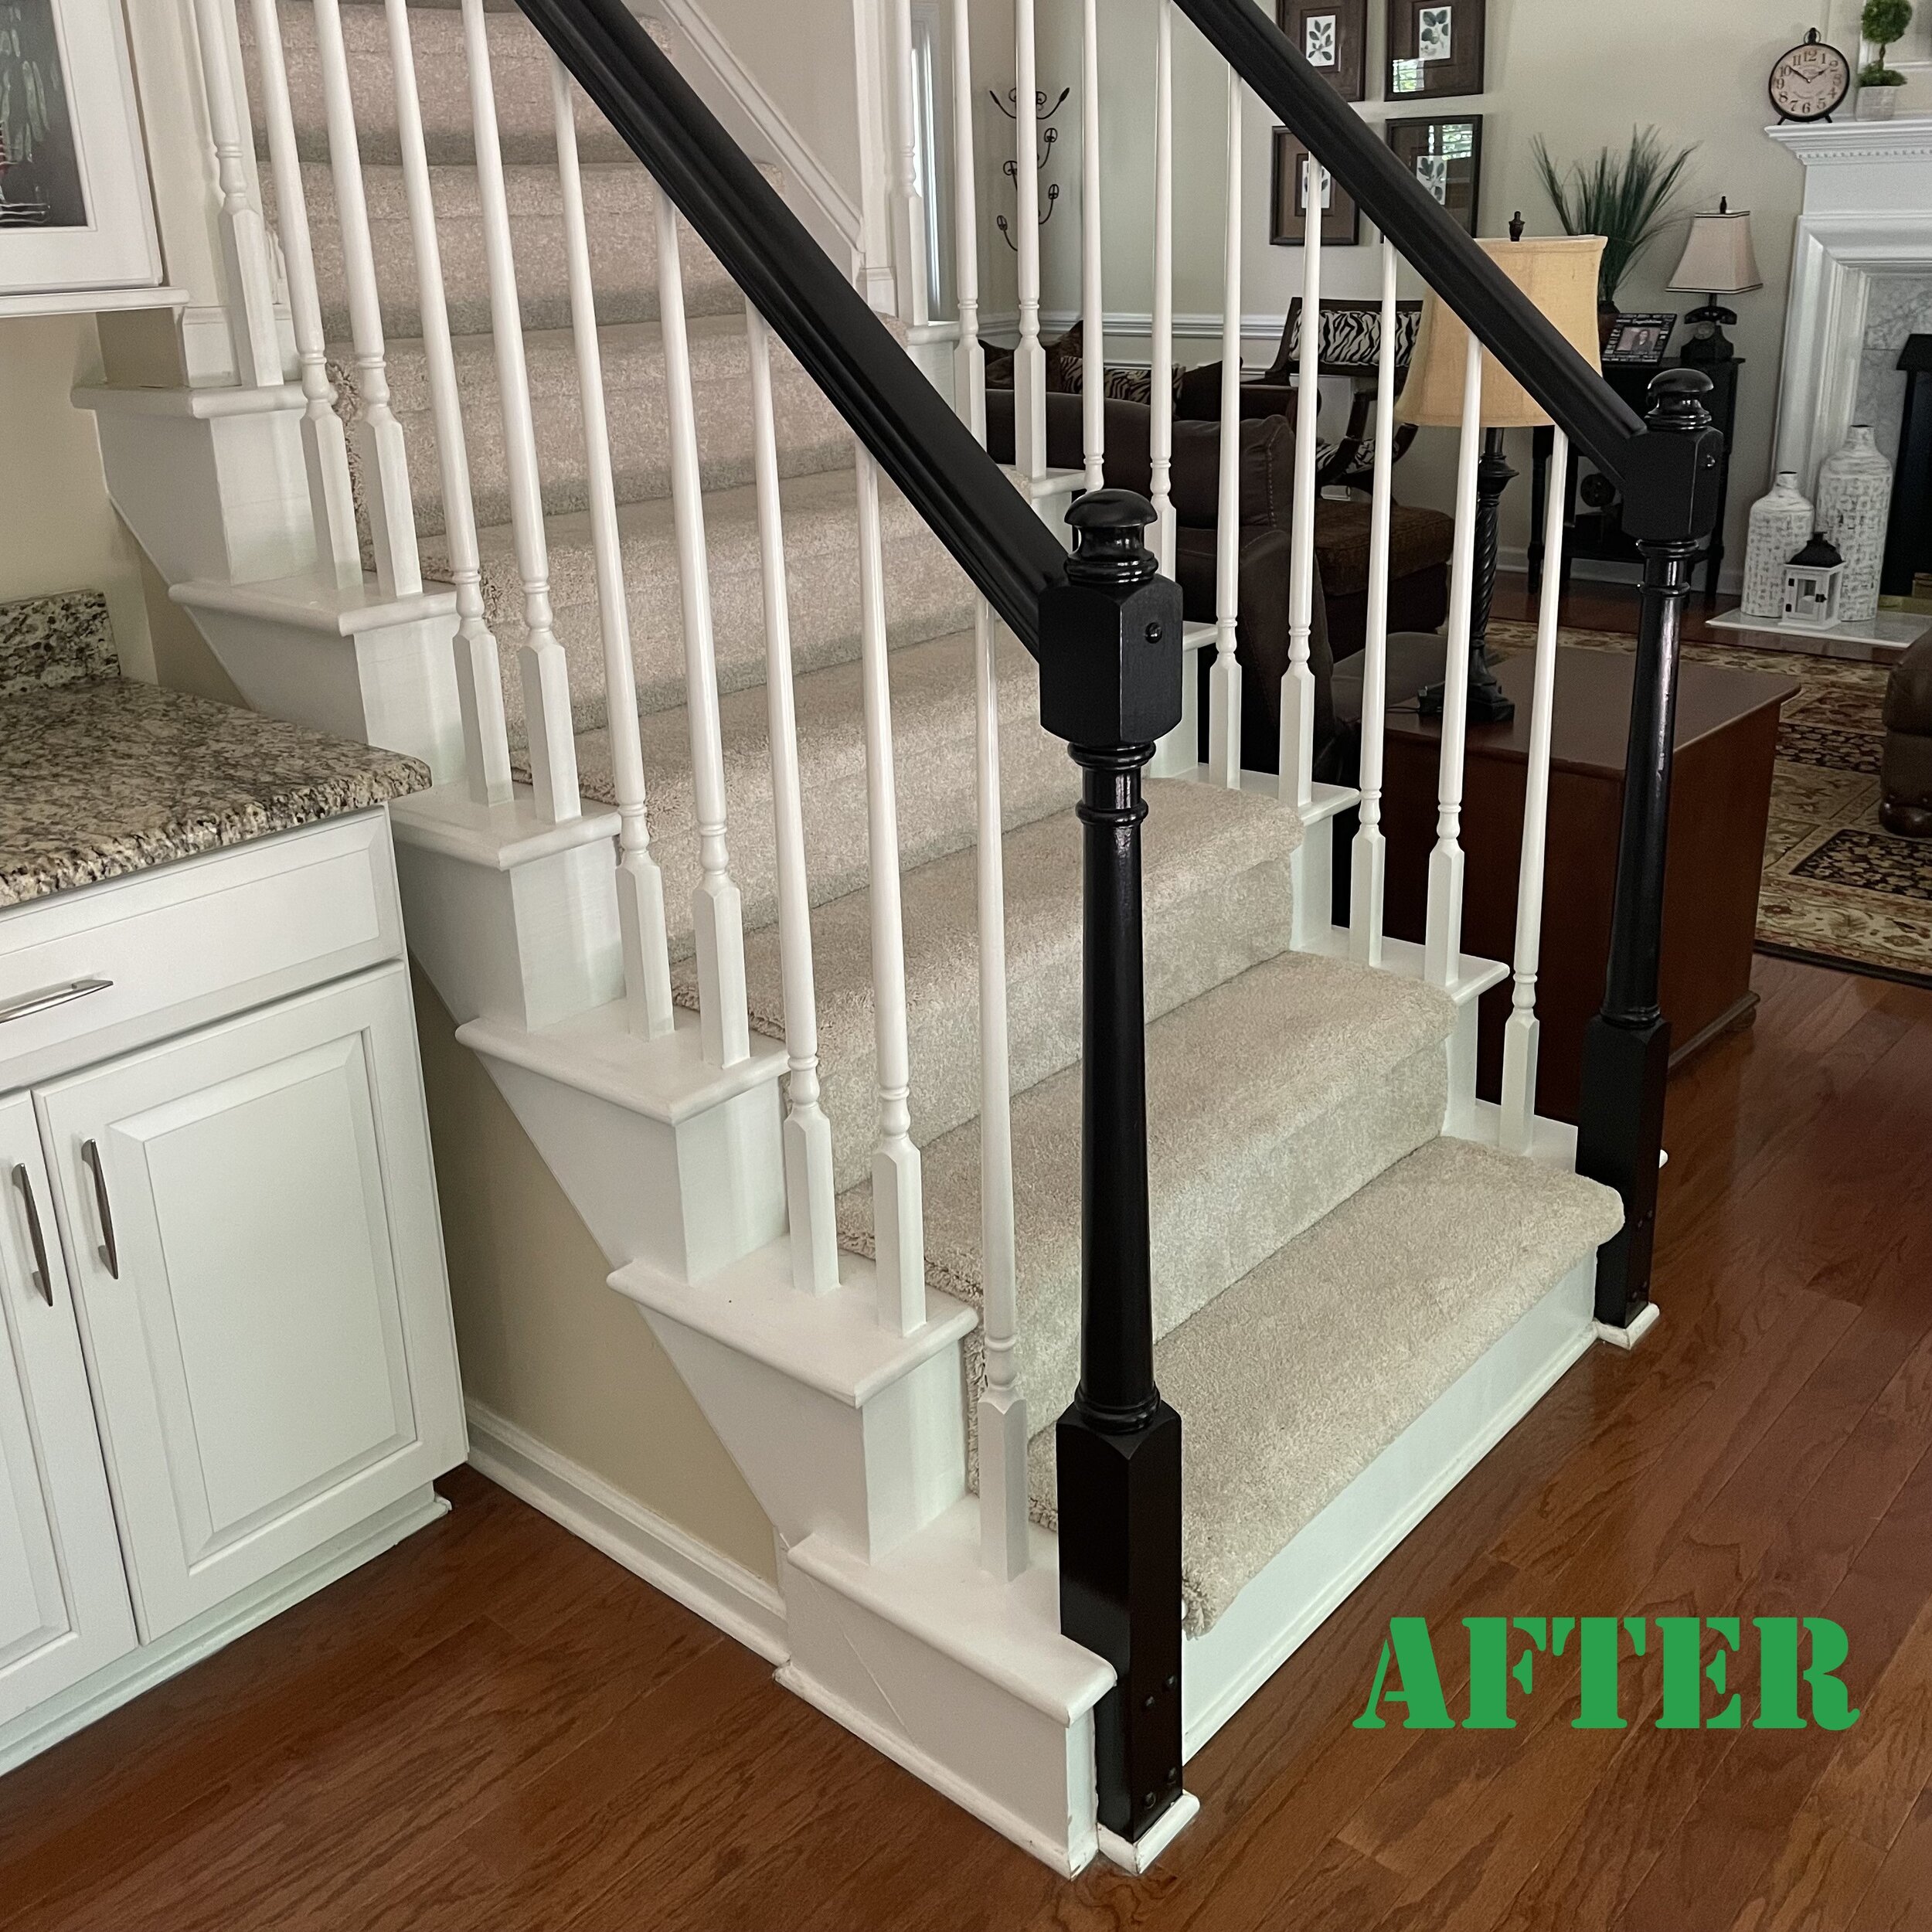
This project has been a long-time coming for my husband and I. The staircase was the last place in our home that still revealed the 90’s oak wood and was very out of place with the décor and other finishing’s. It was in dire need of an update. As always, life is busy and it’s been close to five years since we first mentioned painting them. Well, I guess I got a spark of confidence, a burst of energy and motivation to surprise my husband for his birthday. Yes, I alone decided to tackle the staircase painting! 💪💪💪 Was I crazy? Was it too much of a project to handle? “How bad could it be?” I thought to myself. So one day when the kids were away and my husband was on a long day of work, I decided to take a trip to the home improvement store and dive right in. Note: I was kidding myself that I could finish this project in one day and surprise my husband. This project took a little over two days to do the right way, so allow yourself some time.

Keep reading to find out how to transform your stairs and bring them out of the 90’s for good. If I can do it, you can too!😉 Wait! Before we get started, I want to thank my dad for equipping me with the skills, knowledge and confidence to tackle a home improvement project like this….THANKS DAD, love you!


Let’s Begin!

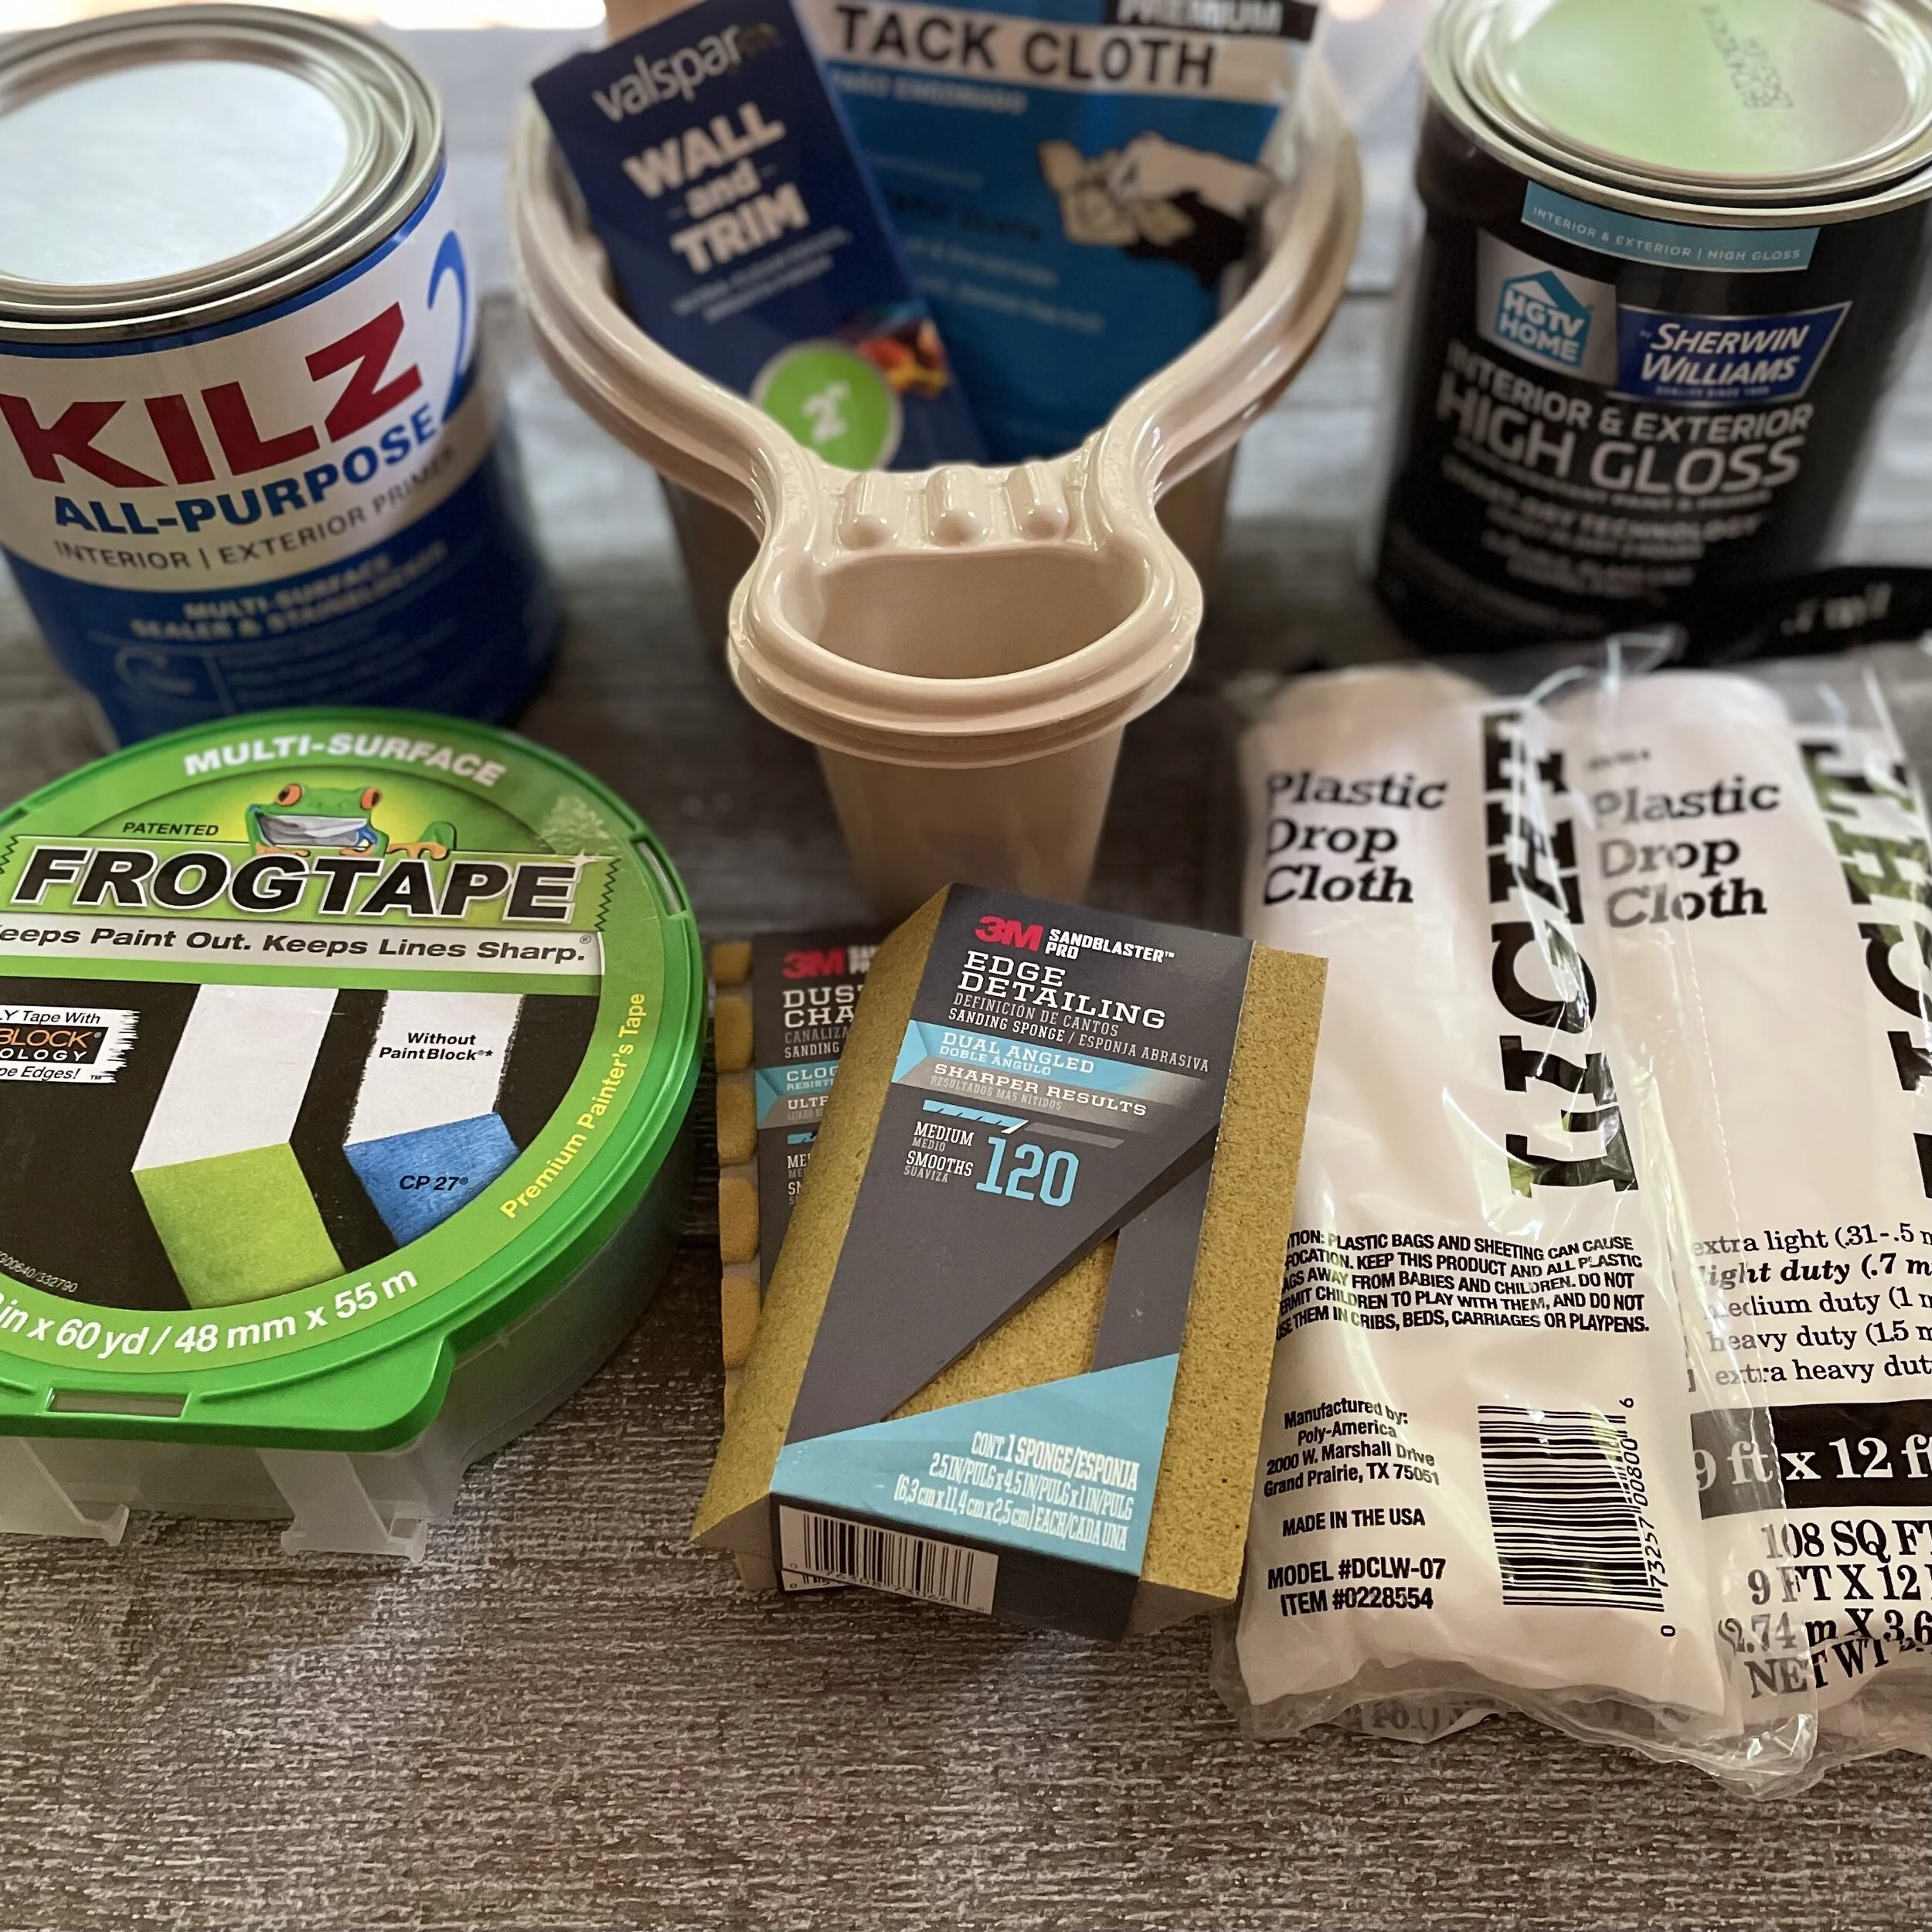
Materials needed:

IMG_8738.jpg
  • Frog Tape

  • Drop cloths

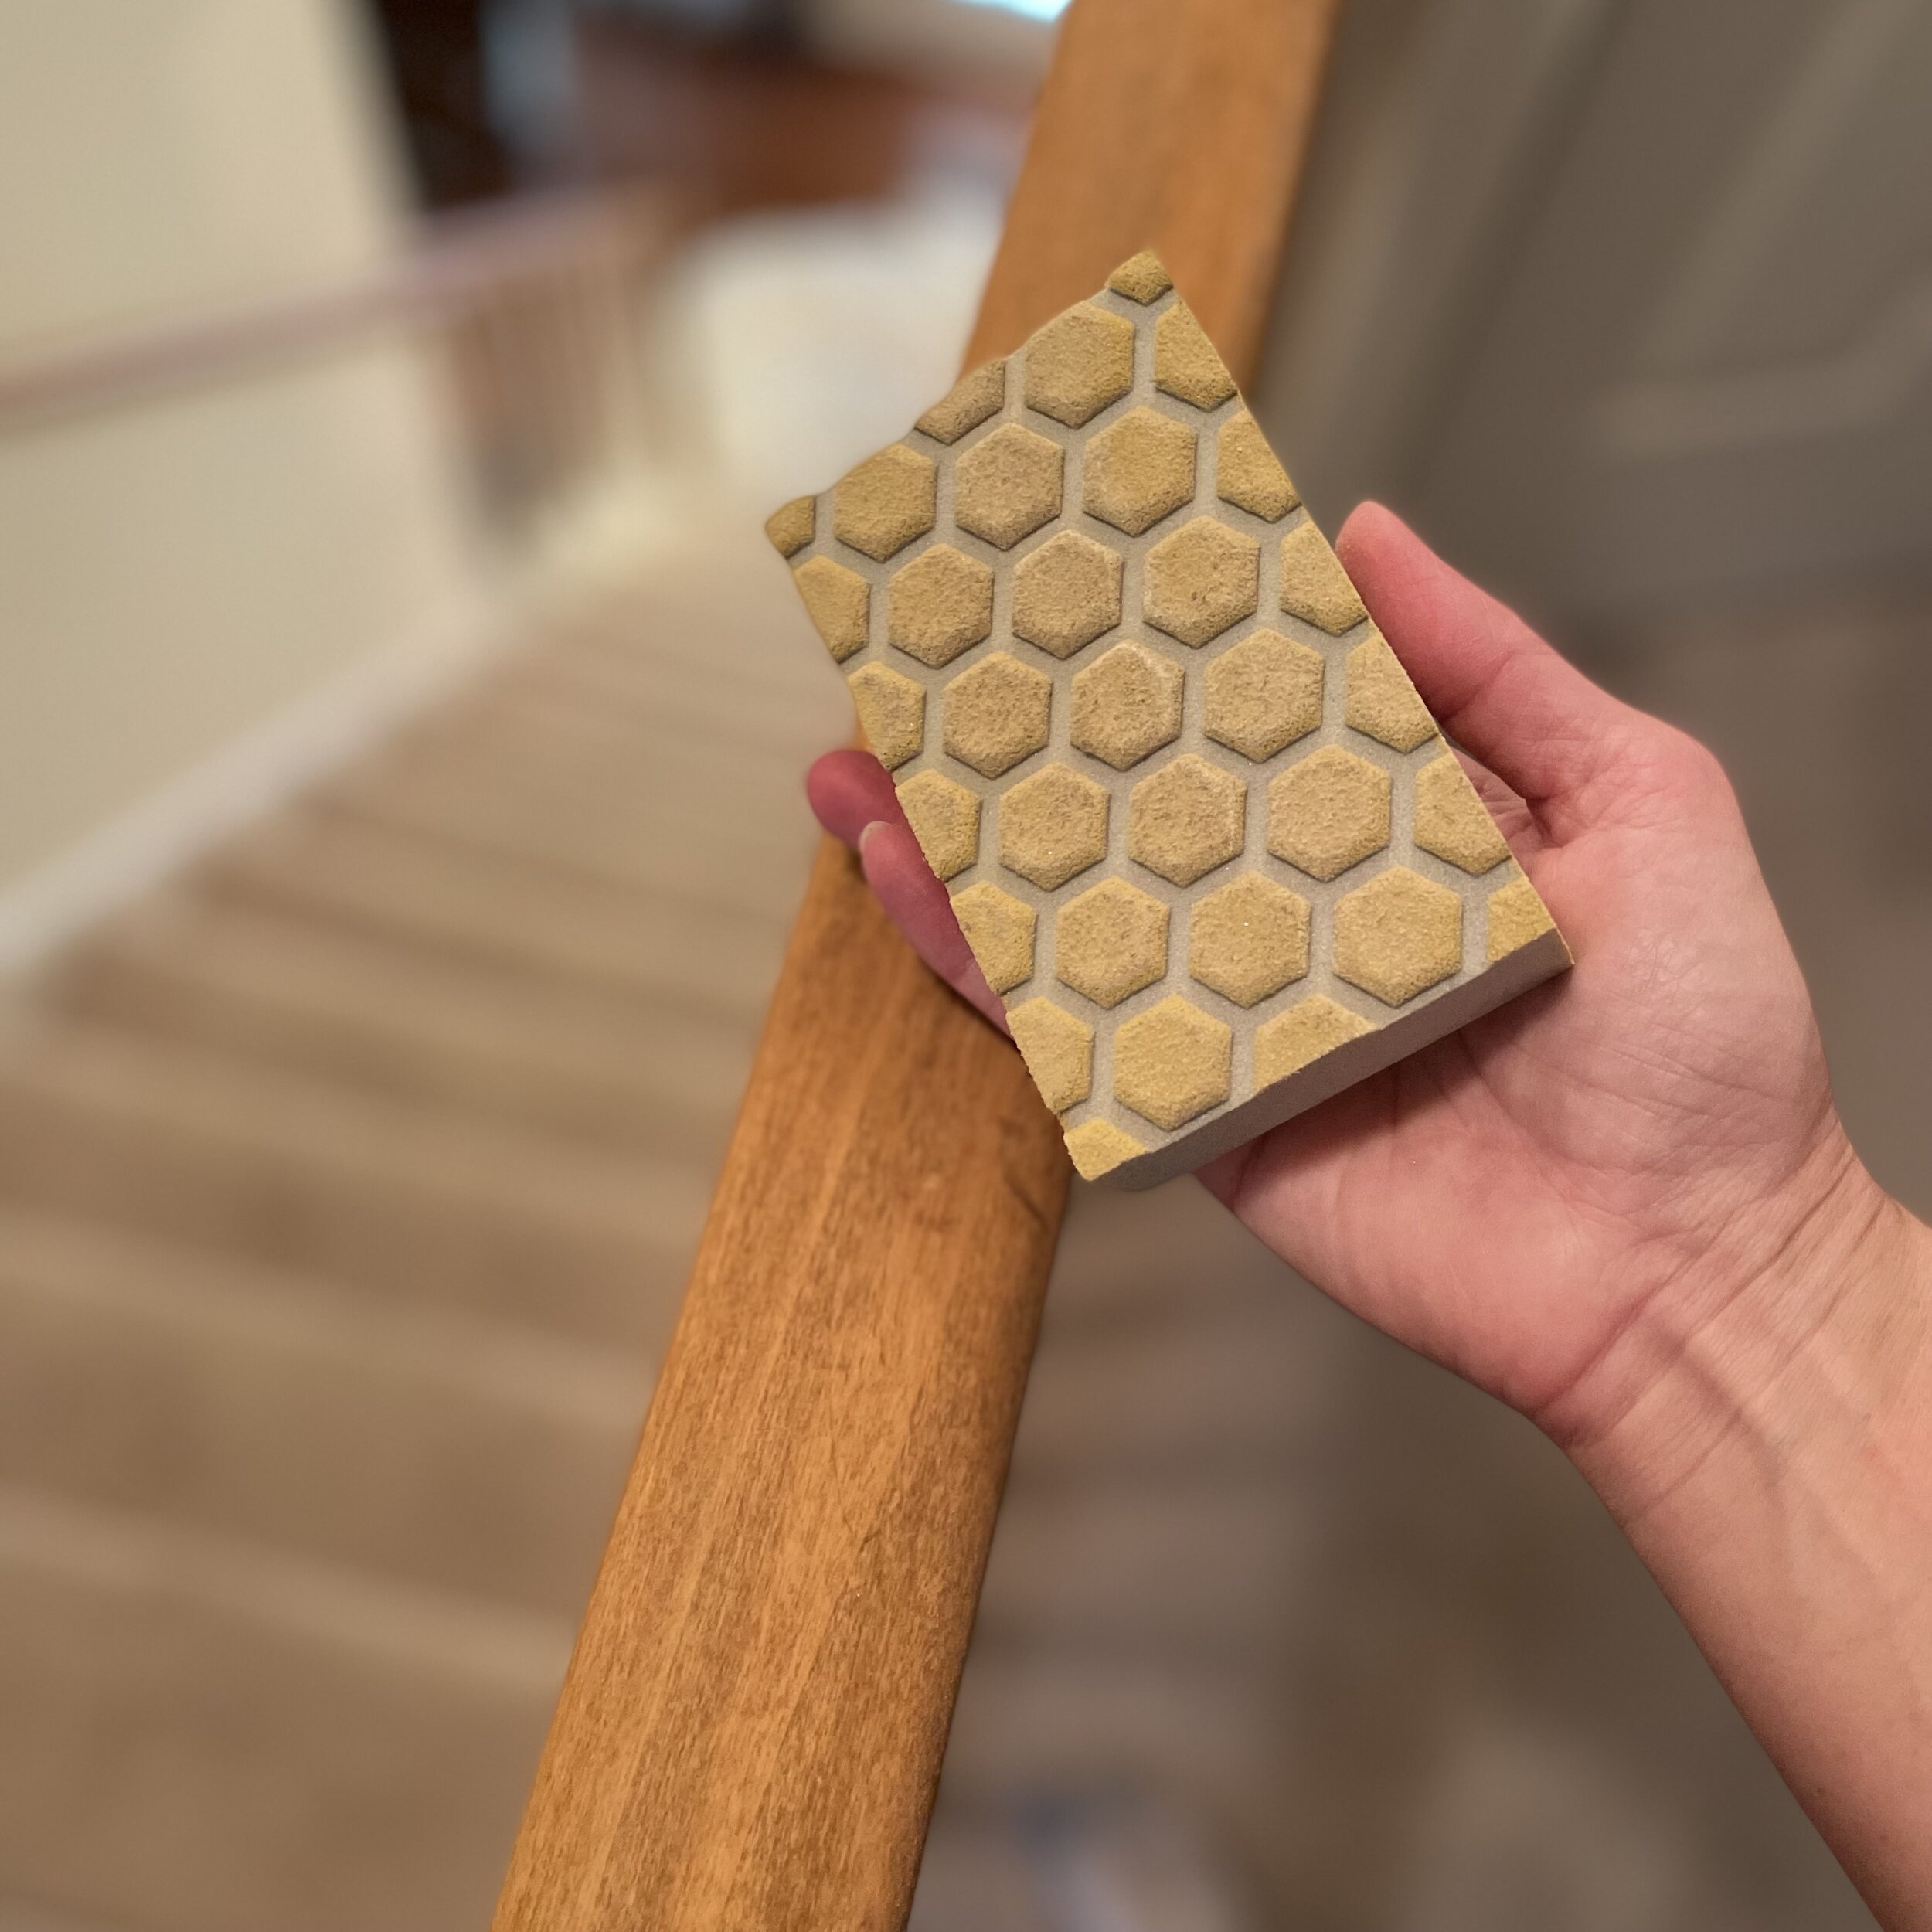
  • Two 120 grit sanding blocks (edge-detailing type)

  • one 1” and one 2” angled wall and trim paint brushes (high quality)

  • Tack cloth

  • Interior paint primer

  • Interior High Gloss paint

  • 2 paint containers

IMG_8740.jpg

Note: You can choose water or oil based paint or primer, but I chose to use water-based primer because it cleans up easily with water, dries quickly, and does not have a strong smell.

(but if you’re a risk taker and strong smells don’t bother you, by all means….have at it! …but with all the surrounding carpet, this girl wasn’t going to chance it😉)
IMG_8740 (1).jpg

For the paint: I used an acrylic high-gloss interior paint and primer combo. It claimed to be durable, withstand frequent washing and scrubbing, (which is important on this high-traffic area), mildew-resistant and protection from cracking, peeling and blistering. Also, one of my favorite features was the short drying time! (2 hours)

Step by Step Instructions:

Follow my step-by-step instructions for painting your oak staircase. Transform your stairs into your own beautiful work of art that you will cherish and be proud of every time you walk into your home.

Step 1: Clean Oak Staircase

IMG_9809.jpg

Use Dawn dishwashing liquid (or generic) and a rag with warm water and thoroughly clean the rails and surface of every area to be painted or taped. Dawn helps to remove the oil and dirt from this high-traffic area and prepare the surface for the next step. Let dry and then start the next step, sanding.

Step 2: Sand Oak Staircase

Why is sanding important before painting your stairs?

If you want a good end result, sanding is a very important step that you should take the extra time to do. It removes the top finish and roughs the surface up a little to prepare for the primer and paint to be evenly absorbed and bond well. It also helps to prevent future chipping and peeling. I’m a firm believer in sanding any wood surface before painting and you want it to last for years to come without touching it up every year. DO NOT SKIP THIS STEP.

What type and grit sanding block to use when sanding stairs before painting?

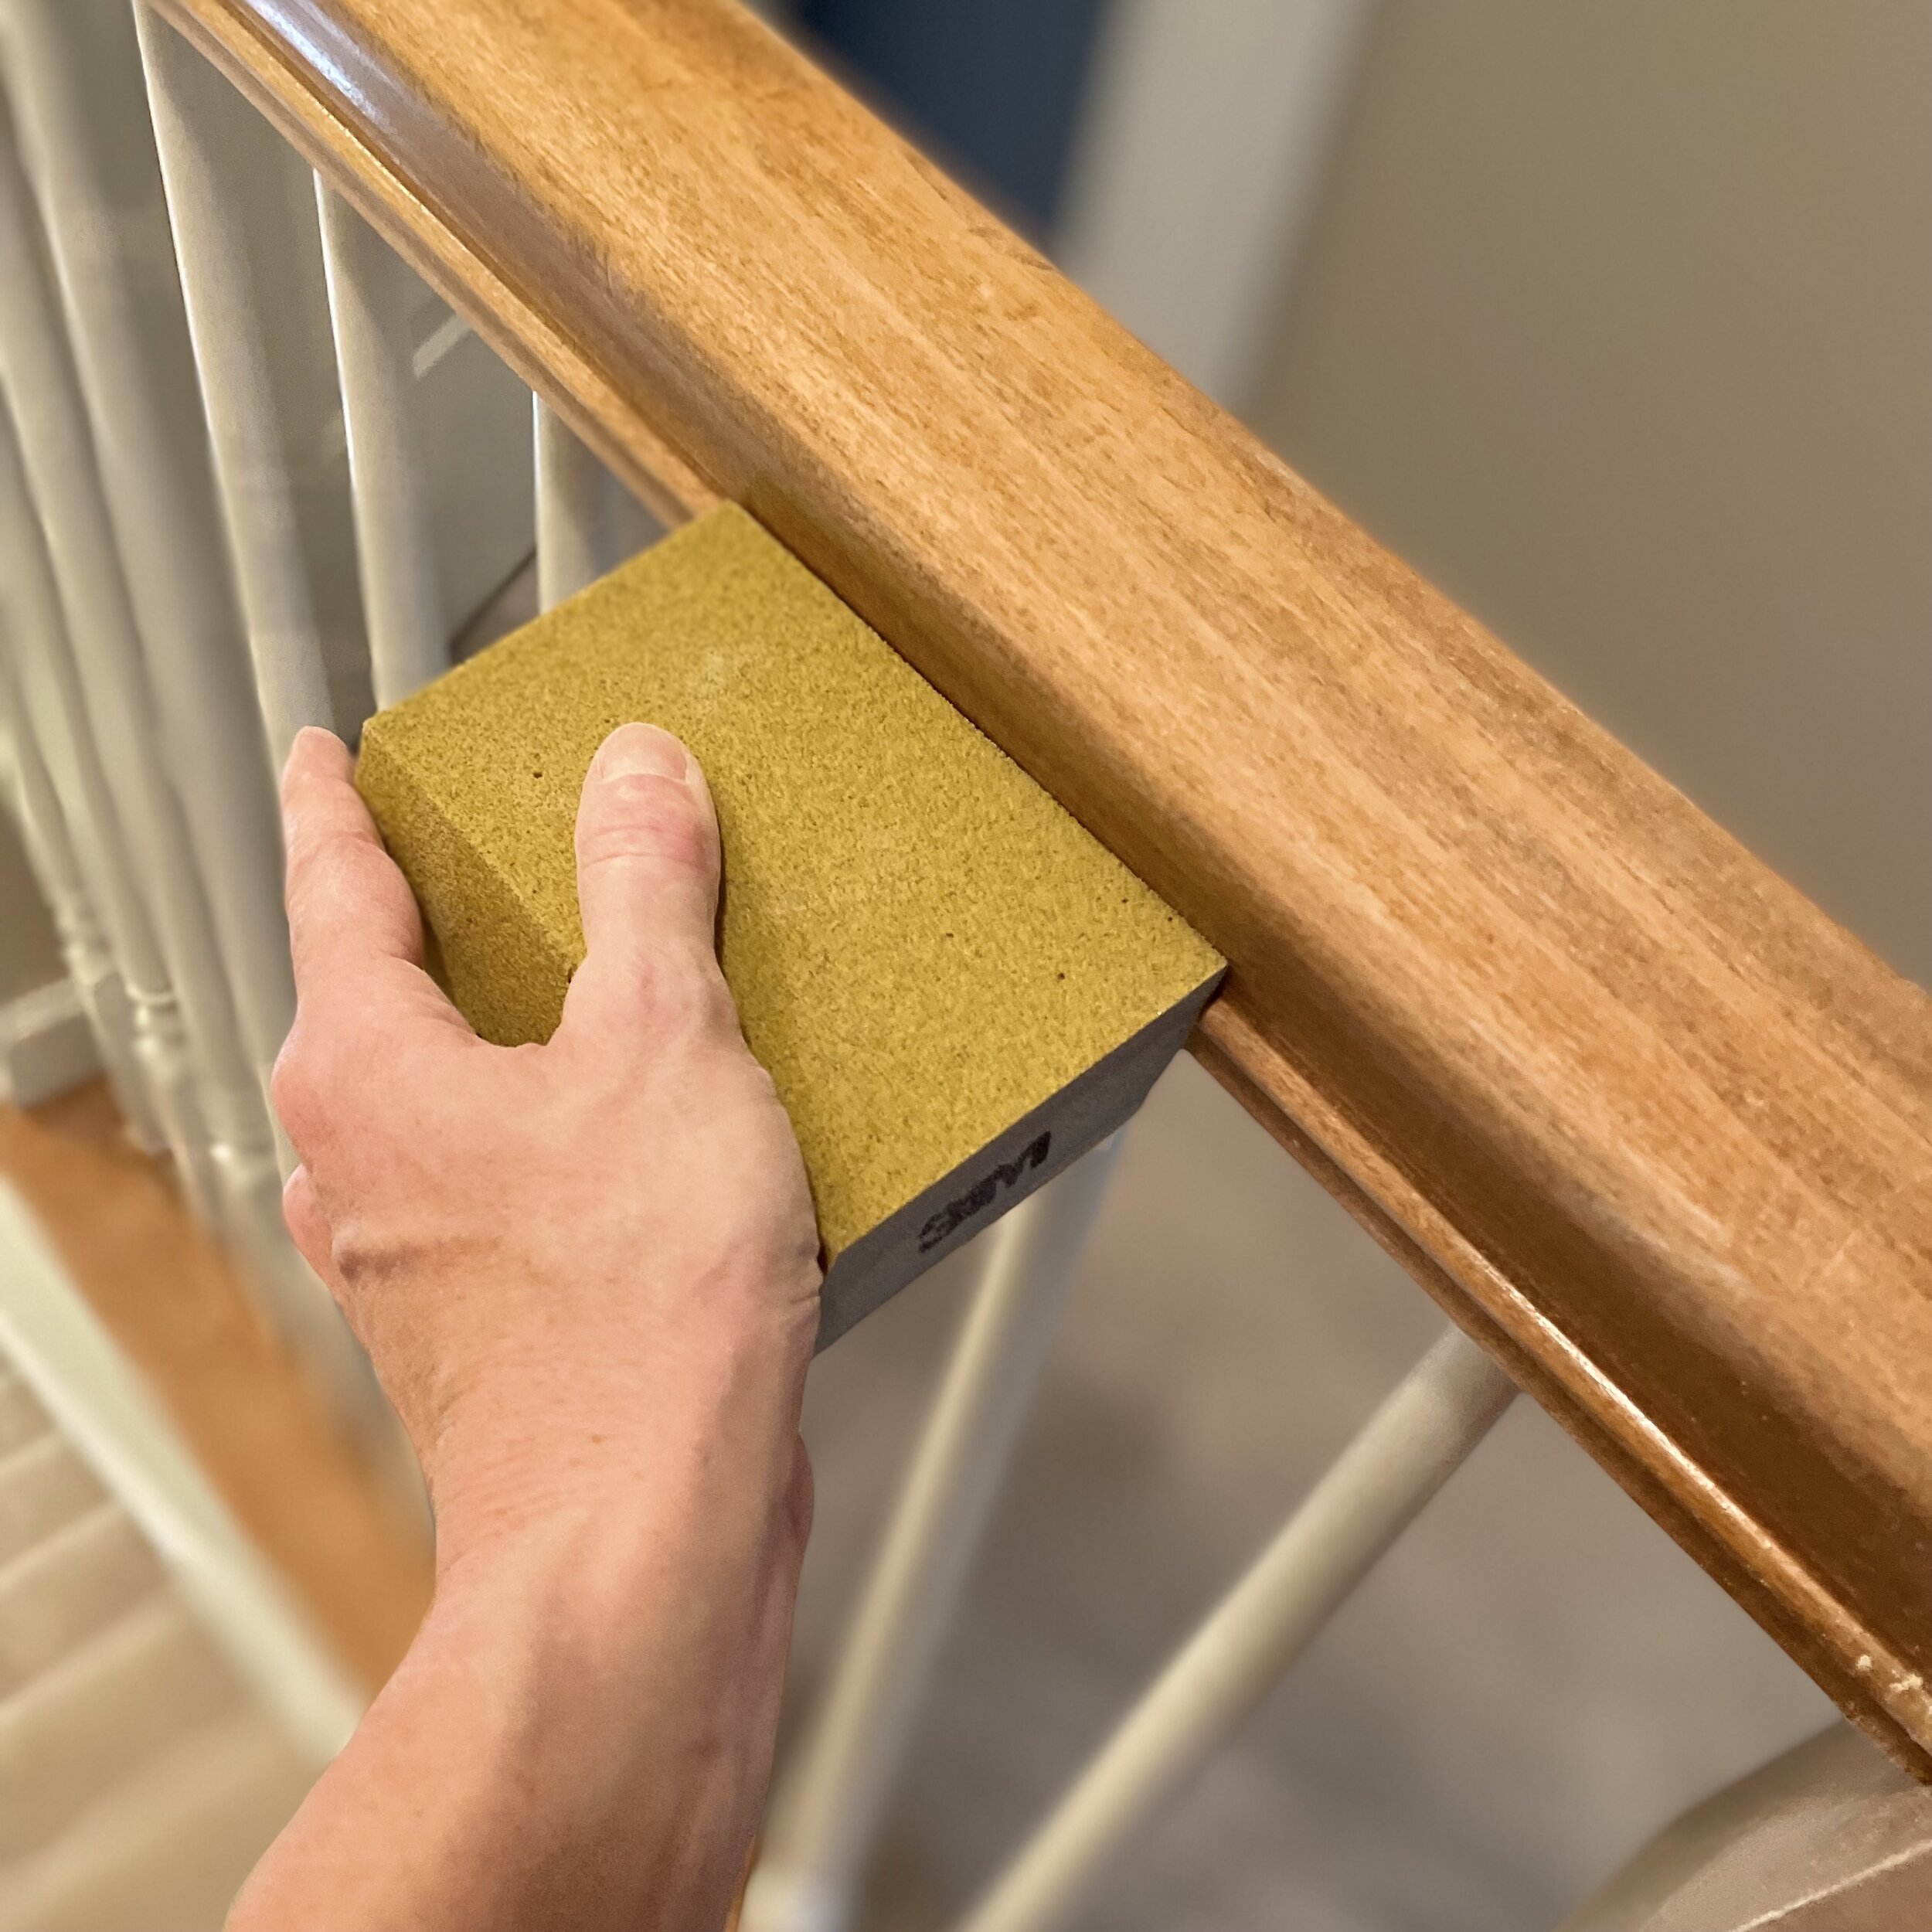
The sanding block on the left is an edge detailing block. It is angled and great for sanding grooves, details, edges and hard to reach places. The sanding block on the right is a dust channeling, clog resistant block I thought would be needed and useful. However, in retrospect, I should have just bought two of the edge detailing angled blocks, because that what I used the most and was very helpful. I mainly just used the other one on the flat, wide areas of the rail.

After some thought, I decided to use 120 grit sanding blocks. What does this mean? Well, if you are a newbie to home improvement, basically the higher the grit, the finer the grains and smoother the finish (with less scratches and damage.) If you choose a lower number grit, it may be too coarse and show fine scratches or grooves after painting.

What is the proper technique for sanding wood stairs?

Start at the top of the railing and then work your way to sides and bottom, giving extra attention to areas that were used the most, (such as the top of hand rails.) These areas were extra dirty and oily from hand traffic and even though the rails were cleaned regularly by me, and even right before with the dish liquid, there were layers of grimy oil coming off the top of rails, gross!

Sand in the direction of the grain where possible, especially on top and sides of rails. What happens if you sand against the grain? If you sand perpendicular against the grain, it may later reveal faint scratch marks when painted with the high gloss paint. Use long, smooth strokes with the grain, on the top and sides for a smooth, even result. For the hard to reach, tight areas, press your angled sanding block into the nooks, crannies, such as between spindles.

Photo of oak stairs after sanding and before clean up. As you can see, lots of oily grime came off during the process, yuk. I also draped an old sheet over our couch next to stairs for an easy clean-up.

Photo of oak stairs after sanding and before clean up. As you can see, lots of oily grime came off during the process, yuk. I also draped an old sheet over our couch next to stairs for an easy clean-up.

Step 3: Clean, Dry, and Use Tack Cloth

As you can see above, sanding left a huge mess to clean up. Grab your vacuum cleaner first, and suck up most of it, then wet a clean rag and wipe down the entire surface.

Pictured above is what tack cloth looks like. It came in a pack of two, but I only needed one. After everything is dry, bunch up your tack cloth and begin going over the stairs to remove every last loose particle you can. Push it into the nooks, crannies and around the spindles. You will want to do this step to ensure your surface is clean and without leftover debris from sanding in order for painter’s tape to adhere nicely and primer to go on smoothly without debris caught in paint. After this is done, you may begin the next step of taping/prepping.

Step 4: Tape and Prep

This is the most tedious, but most important step to this project. I’m not going to lie, it’s not fun and it’s take a LOT of time, but prepping before painting is well worth the extra effort. Luckily, for me, the lower halve of stair landings and the rails had already been painted by the previous owner, so I dodged half a bullet. 😉

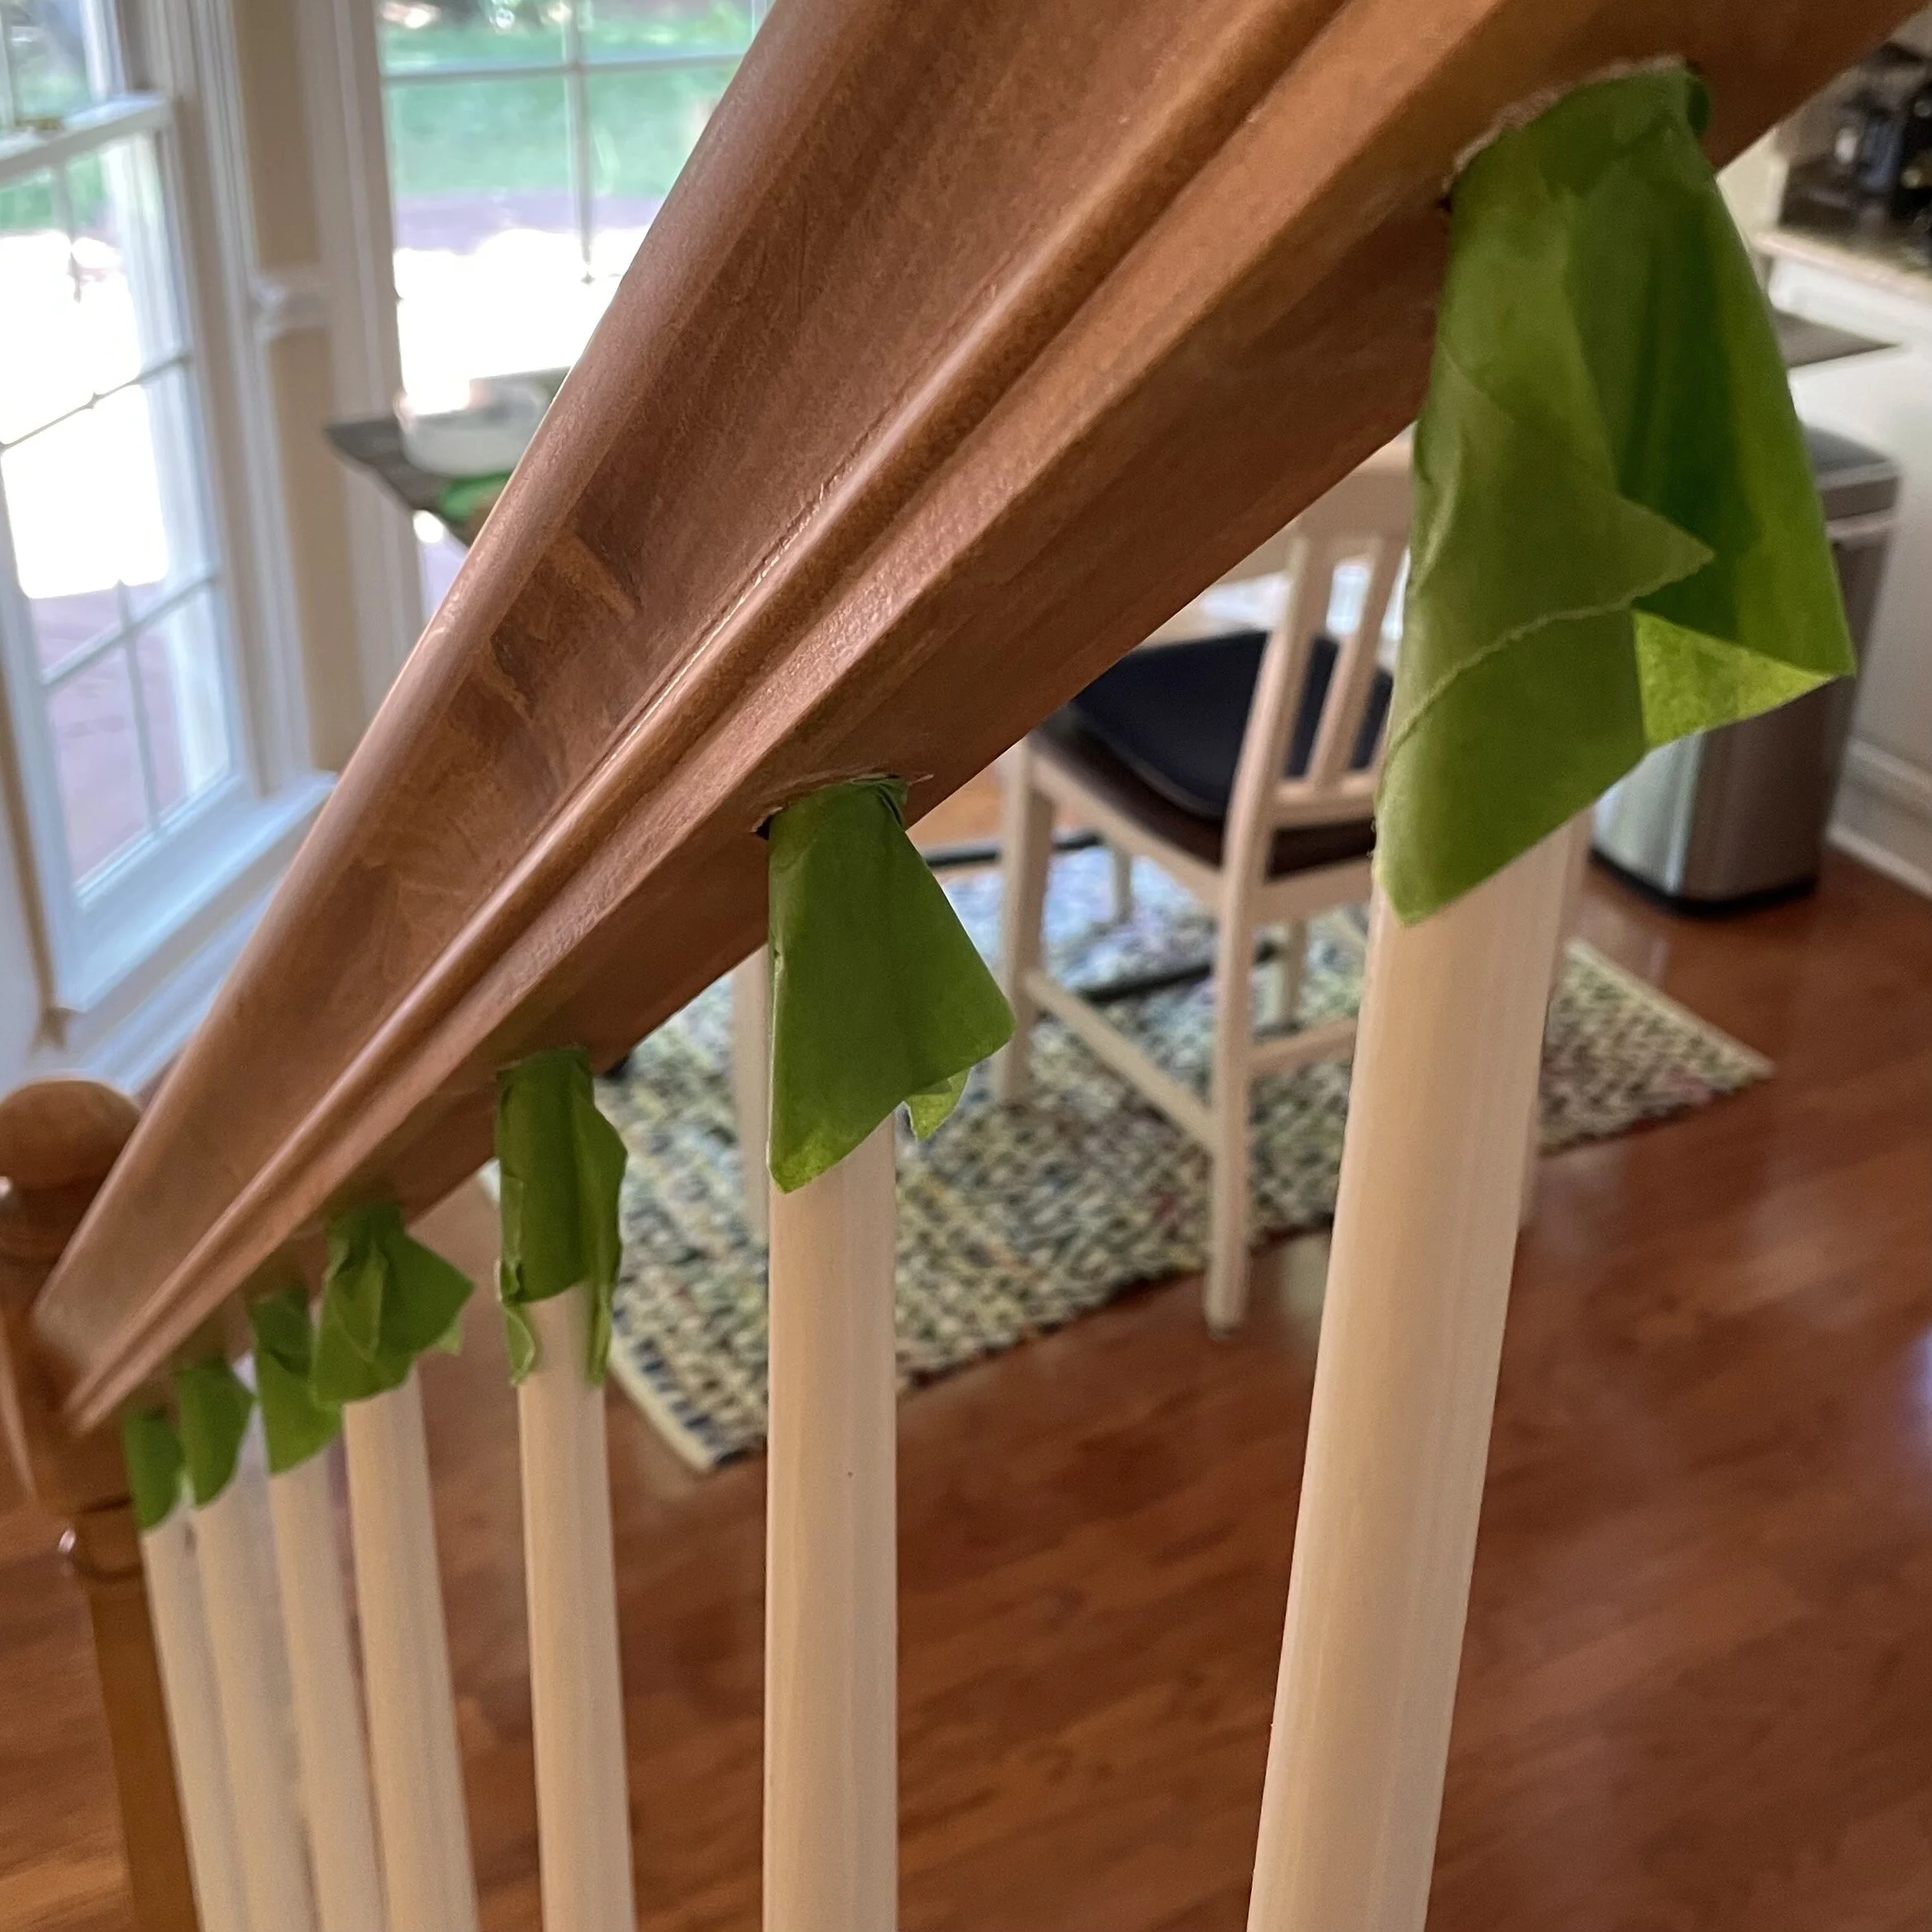
Our stairs had a total of 37 spindles. On the lower portion, I just taped off the top of spindles since the landings were already painted. You’ll want to wrap them tightly at the top and press down all the way around to ensure no paint bleeding. I tried to leave a little edge of the tape hanging out at bottom for easier pull off after painting.

I never really gave much thought to the handrail wall plate mounted on the bright colored wall until I realized I needed to tape it up for painting black….EEK!! 😱 There was no turning back at this point. Why couldn’t it be square??? …but NO, ours had to be OVAL! So, I sucked it up and did my best to come up with a method to tape it up.

As you can see above, I started laying down one piece of tape at a time, then used a box cutter to cut between plate and tape. I then carefully peeled back the piece not needed and repeated until completely taped. That method actually did a great job, just a few touchups were needed afterwards. Maybe there is a better method out there, but this is the best I came up with.

How do I tape off stairs around carpet?

The top of the stairs were a little more complicated at the bottom, due to the landing, which needed painting. Worse, was the issue of the carpet being right against the stairs. What I did was, tear off portions of the painter’s tape and push back carpet while pushing the tape down in between landing and carpet, and then pressing tape down onto carpet. I repeated and then taped down drop cloths to further protect carpet from paint drips.

Will I need to put plastic drop cloth around spindles?

Yes, I suggest that you protect your spindles by wrapping them in plastic, as well as taping some plastic to the wall behind the hand rail, as shown in photos above. As particular as I am, and especially when using black paint, I over-protected everything. Who wants MORE work after all THIS work? NOT ME!!

You can never have enough protection. Also note, that I moved around a plastic cloth and sheet (not pictured) in different areas like the steps to protect carpet while I was painting.

Step 5: Prime Oak Staircase

Why do I need to prime my stairs first before painting?

After your stairs are all properly prepped for painting, you will need to prime them first. Priming is important to ensure adhesion of the paint, hence the verb “prime” is in the word “primer.” Primer also hides previous colors and blocks stains and knots in wood.

No one realizes how important primer is until you don’t use it. Example: I won’t name any names, but there was this person who decided to JUST use white paint on unfinished ship lap boards a while back. Even though 3-4 coats of paint was applied, the dark knots in the wood still bled through. Even after another couple of coats about 2 weeks later the dark spots were visible again. This time, they showed up more yellow-brown and yucky, (not a good look in a crisp, clean black and white bathroom.) Point is, if you do it right the first time, you will be satisfied and rewarded by the effort. So just buy the primer already and do it! (I’ve always had wonderful results with KILZ brand.)

How many coats of primer do I need to apply?

Above are photos of the stairs with one coat of primer. One coat of primer is all that you need to put on. It will not look pretty and it’s ok that you can still see some of the wood grain shining through. By applying primer first, you are still giving the paint the proper vessel to adhere to. ….and also, let me ask you now: “Aren’t you SO glad you did a great job on prepping before painting?” All that hard work taping everything off and protecting the carpet and walls paid off,👏👏👏(clapping for you, because I betcha there were a few paint drips or wild brush strokes that would have otherwise ended up in the wrong place!)

Now….on to the PAINTING!!!

Step 6: Painting Oak Stairs

Almost done!! The next step is applying the paint to the primed stairs.

What type of brush will I need for painting wood stairs?

First off, you will want to choose a high quality brush for painting wood with high gloss paint. A synthetic brush is the best choice, preferable 100 % polyester. You do not want to use a natural bristle brush because if you use a water base or acrylic paint, the brush with soak up and absorb the moisture and the bristles with become more limp and ineffective. Also, cheap brushes tend to lose their bristles in your paint job, which is very frustrating. Just spend the extra couple of dollars and use the good stuff. (I used Valspar and had no regrets!)👍

IMG_9011.jpg

QUICK TIP:

Keep your paint brushes in a plastic baggie during paint drying times (or lunch breaks) so they won’t dry out!

What is the proper painting technique for wood stairs?

You will want to use proper brush technique, especially for the tops and sides of your rails, as well as your landings. Lightly load brush with paint and use long, smooth strokes with the grain of the wood, where possible. Hold your brush at a 45 degree angle, just enough to allow the bristles to slightly flex on the surface. Take your time and make sure you are not missing any areas around spindles, underneath rails, and all the nooks stairs have. I found what worked best for me was to start with the underneath and in-between spindles first, in case you needed to grasp the top of rail for balance. You want to apply thin coats, letting paint dry in-between each coat, until coverage is complete.

How many coats of paint does it take?

There was some areas that only needed two coats of paint, but for good measure, I gave everything three coats of paint. See above, the photo progression showing one coat, two coats and three coats, (from left to right.) The round handrail that starts halfway up the stairs was the most difficult to evenly cover, so I gave it a fourth coat. After letting everything dry completely, look around thoroughly for any areas needing extra paint or attention before starting the next step.

Step 7: Let Paint Dry and Remove Tape

This is when I did my happy dance!! Finally, after all the hard work and preparation, it was time for the big reveal, and even more importantly, what was my husband going to think?

I know you are excited and can’t wait to see the end result, but you need to let the paint completely dry before removing tape. You will want to remove the tape carefully and slowing, peeling it up, then bending it back, low to the surface while pulling. I forgot to take any pictures of tape removal after all the painting was complete, but below is a photo of removing tape before painting the upper landings white. (which was a decision I made halfway through, so that they would match the lower landings.)

IMG_9116.jpg

Congratulations! Finished✔

Well, maybe not quite yet….be sure to check for any areas that may need touching up. We are human, and sometimes our taping jobs are not the best and we can miss a spot, or likewise, cover too much up. Luckily, mine wasn’t too shabby! My husband was thrilled with the results and said it was better than any gift I could have bought him.

Needless to say, I was extremely happy with the results and felt great accomplishment with the hard work…next stop:

IMG_9033.jpg

A well-earned Epsom salt soak! AND….relax!

(I love you Dr. Teal’s!)

Julie Butler

Hi, I’m Julie Butler with Inspiration Apron, a blog full of delicious recipes, mouth-watering photographs, fun crafts and travel inspiration. I’m a southern girl, North Carolina is my home state and I’ve got some southern classics and vintage family recipes along with new and exciting creations. Enjoy!

http://www.inspirationapron.com
Previous
Previous

DIY Whipped Body Butter

Next
Next

DIY Soap Scum Remover