
Black Magic Cake
(Discloser: This is a sponsored post, and I received free product from Nature’s Flavors; However, all opinions and thoughts are my own. Thank you for supporting the brands that keep Inspiration Apron running!)
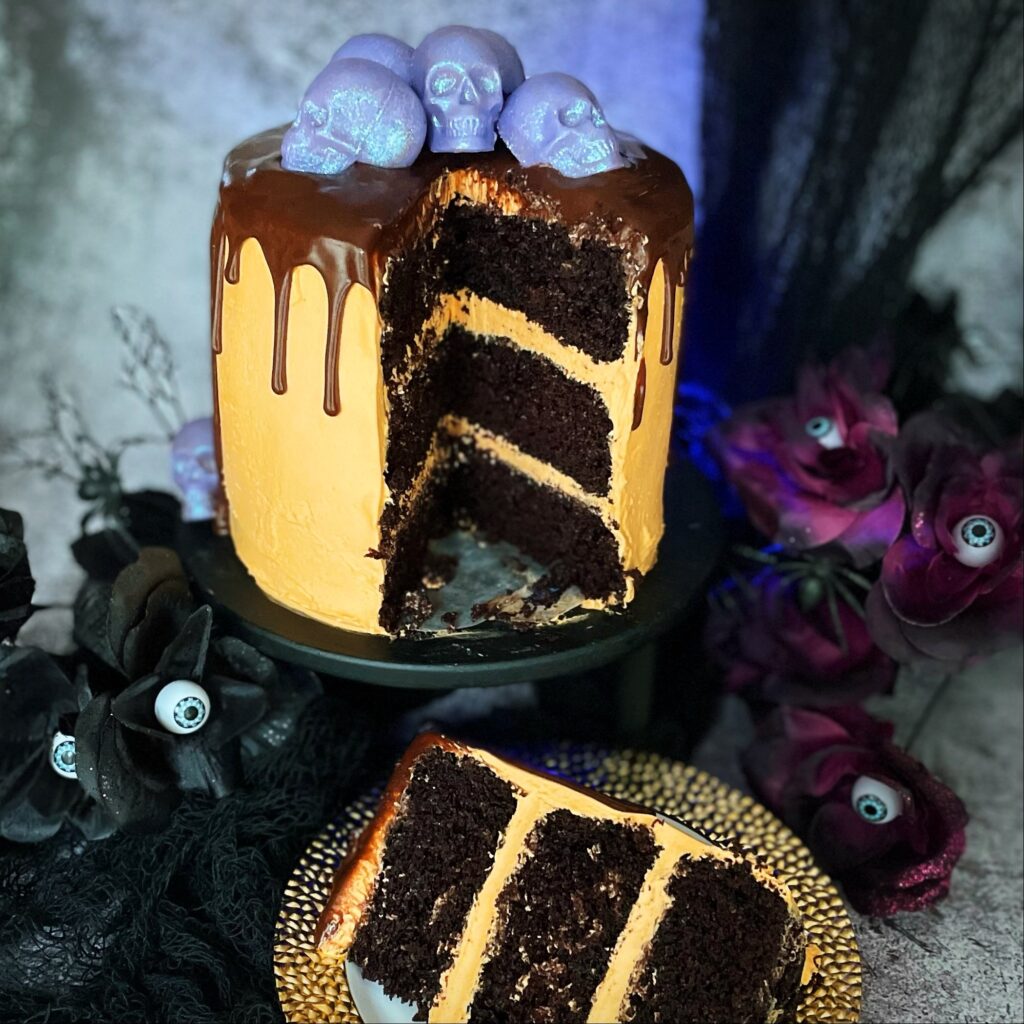
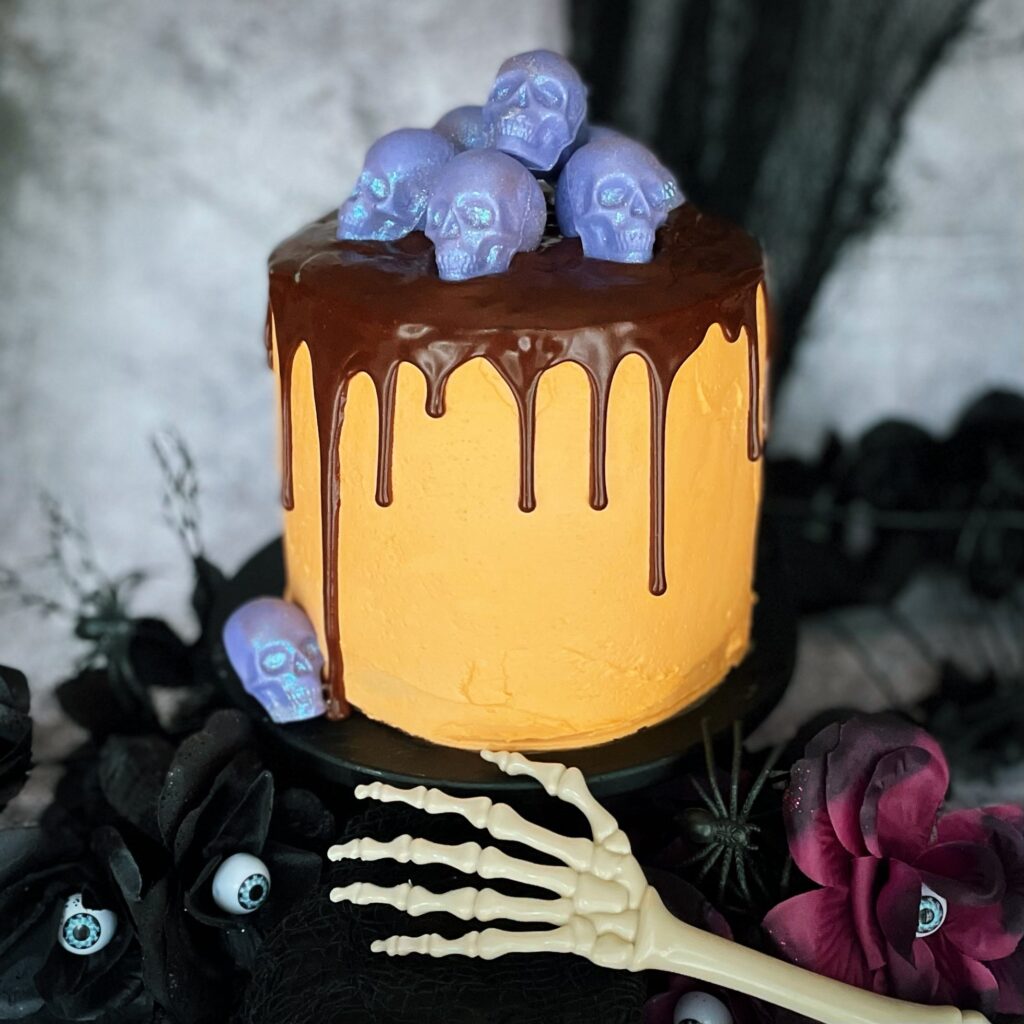
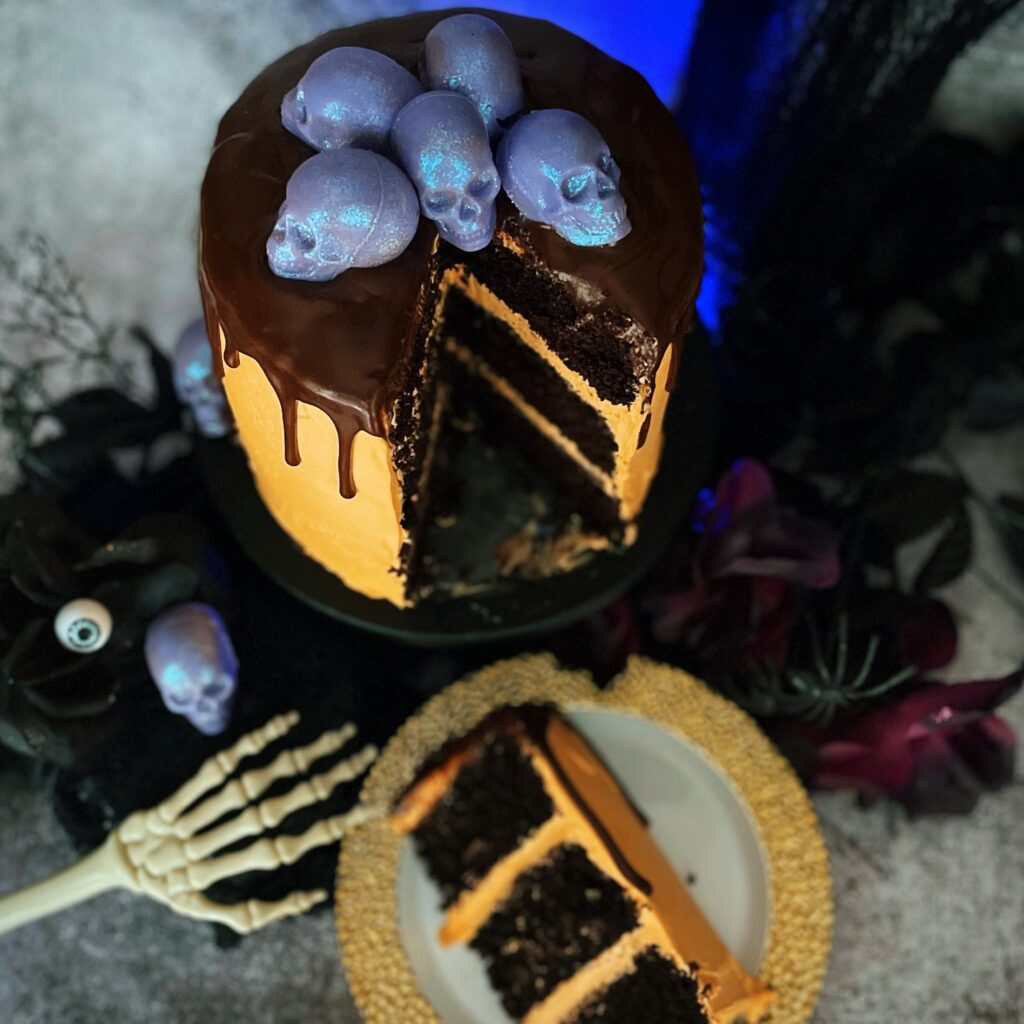
There’s nothing scary about this Black Magic Cake! The name “black magic” actually refers to the strong black coffee added to the batter that lends to the rich chocolate taste. The layers have a deep, decadent dark chocolate flavor that is complimented by the espresso buttercream frosting flavored with Nature’s Flavors organic espresso flavor extract. Since I created this triple layer cake for Halloween, I decided to top it with chocolate molded skulls tinted with purple coloring and edible glitter for a magical touch.
What is a black magic cake?
I made a small three-layer cake using 6-inch pans and had enough batter left over to make 6 regular-sized cupcakes, but you can also make a two-layer cake using 9-inch pans or even a 9×13 pan for a sheet cake, just adjust baking time slightly longer, for 30-35 minutes.
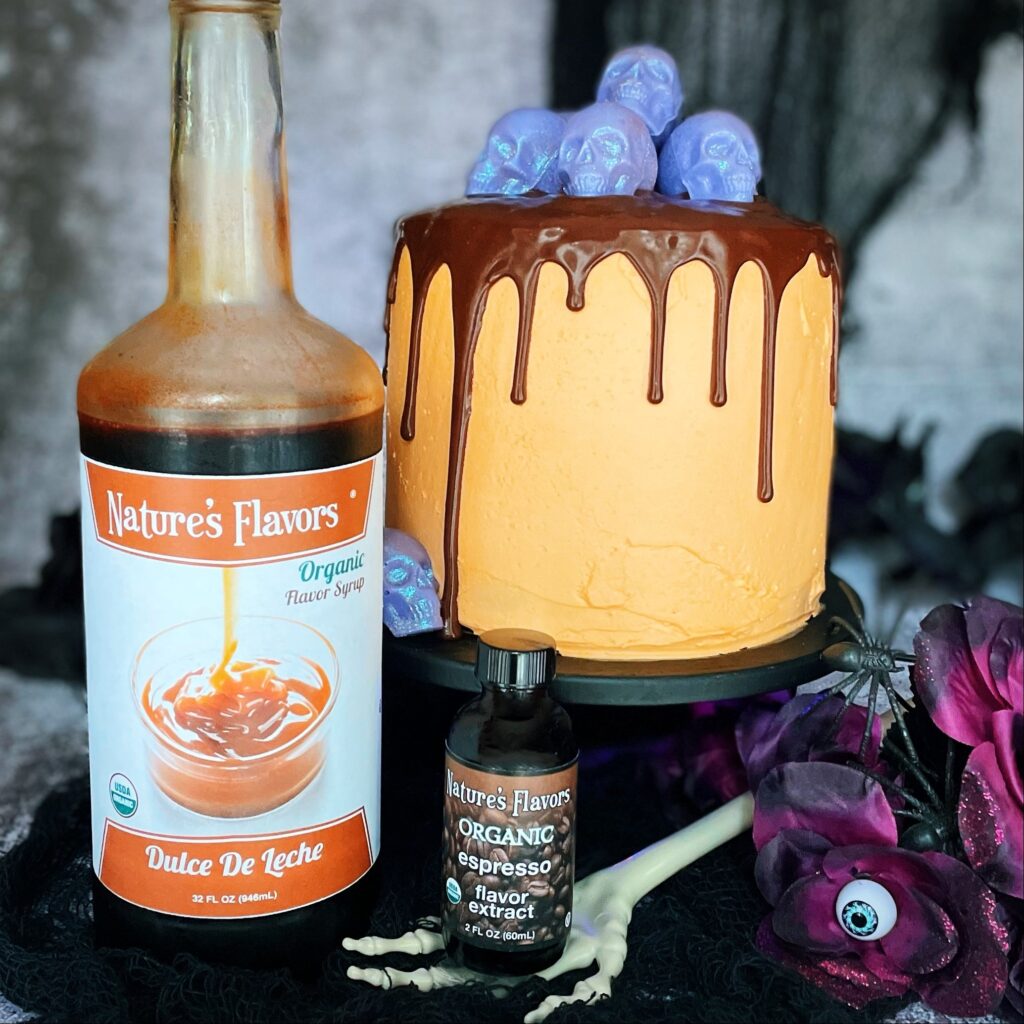
I brushed the chocolate cake layers with Nature’s Flavors organic dulce de leche flavor syrup and the espresso buttercream is flavored with their organic espresso flavor extract for a rich depth of flavor added to this decadent cake.
Let’s begin!
Ingredients:
For cake layers:
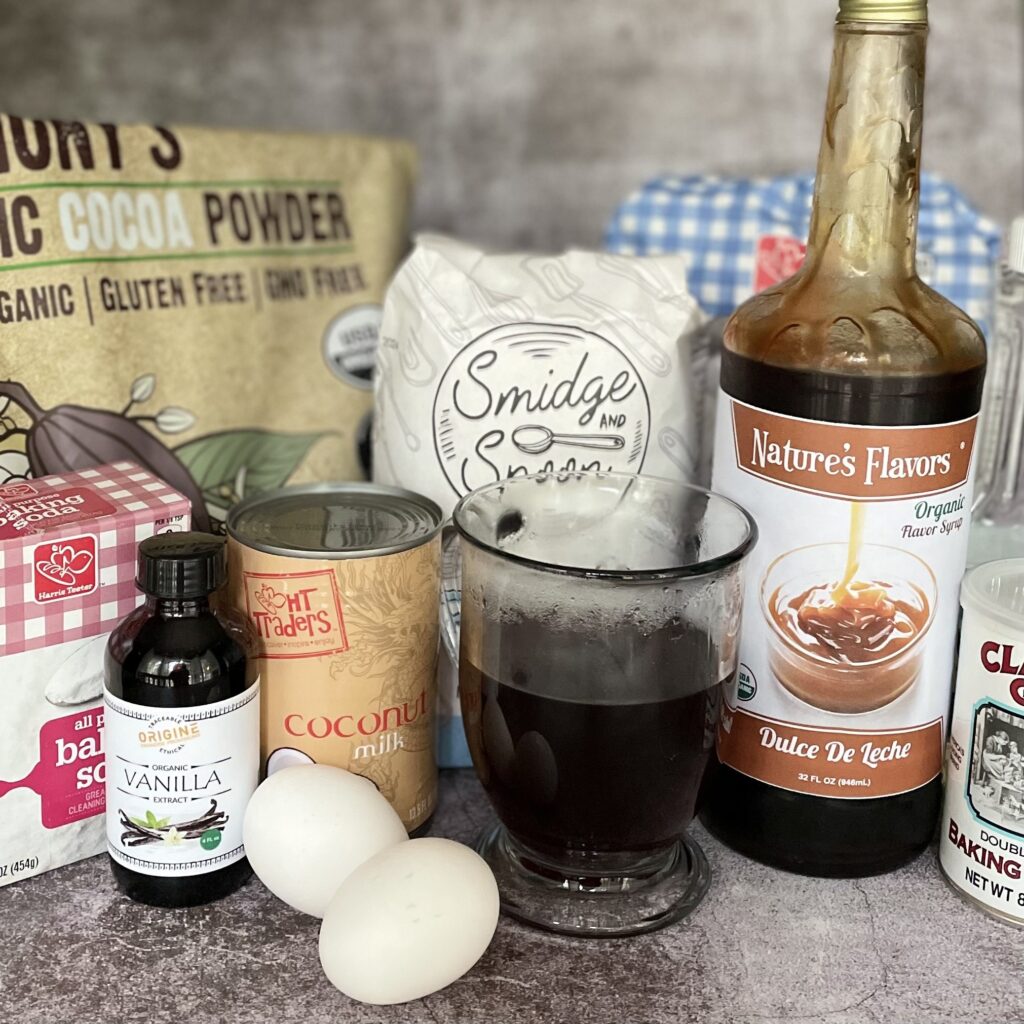
- 1 3/4 cups all-purpose flour
- 2 cups granulated sugar
- 1 1/2 tsp baking powder
- 2 tsp baking soda
- 1 tsp salt
- 3/4 cup cocoa powder
- 2 large eggs
- 1 cup canned coconut milk, full fat (or buttermilk)
- 1/2 cup vegetable oil
- 1 tsp vanilla extract
- 1 cup strong black coffee or 1 cup boiling water over 1 tsp instant coffee
Optional: 2 tbsp Nature’s Flavors organic dulce de leche flavor syrup
For espresso buttercream frosting:
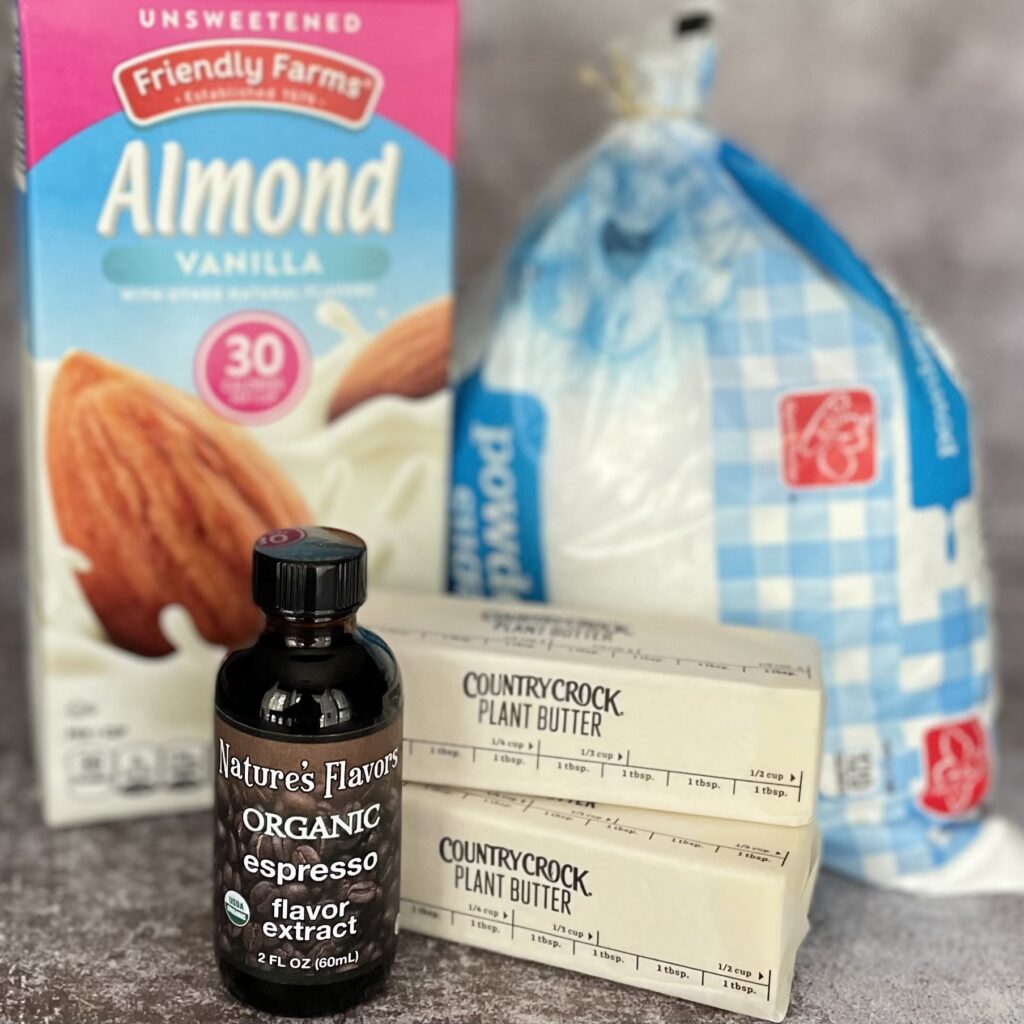
- 1 cup plant butter, softened (or regular dairy butter)
- 4 cups powdered sugar
- 2 tsp Nature’s Flavors organic espresso flavor extract
- 2-3 tbsp plant milk or regular milk
- Pinch of salt
How to make a black magic cake
Instructions:
Preheat oven to 350℉ / 176℃ and grease 3 6-inch pans, lining the bottoms with parchment paper and grease that also. Then dust pans with a light coating of cocoa powder.
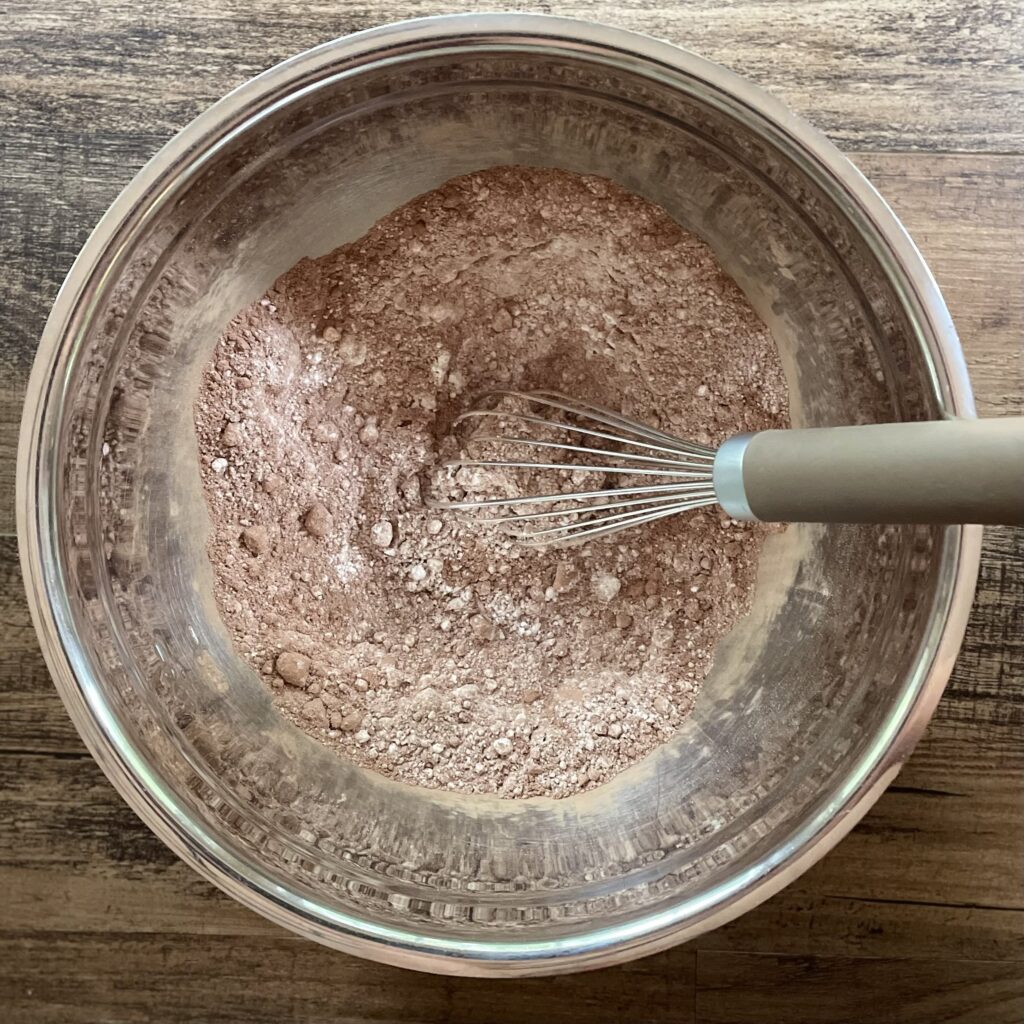
In a large bowl, whisk together dry ingredients (flour, sugar, baking powder, baking soda, salt and cocoa powder.)
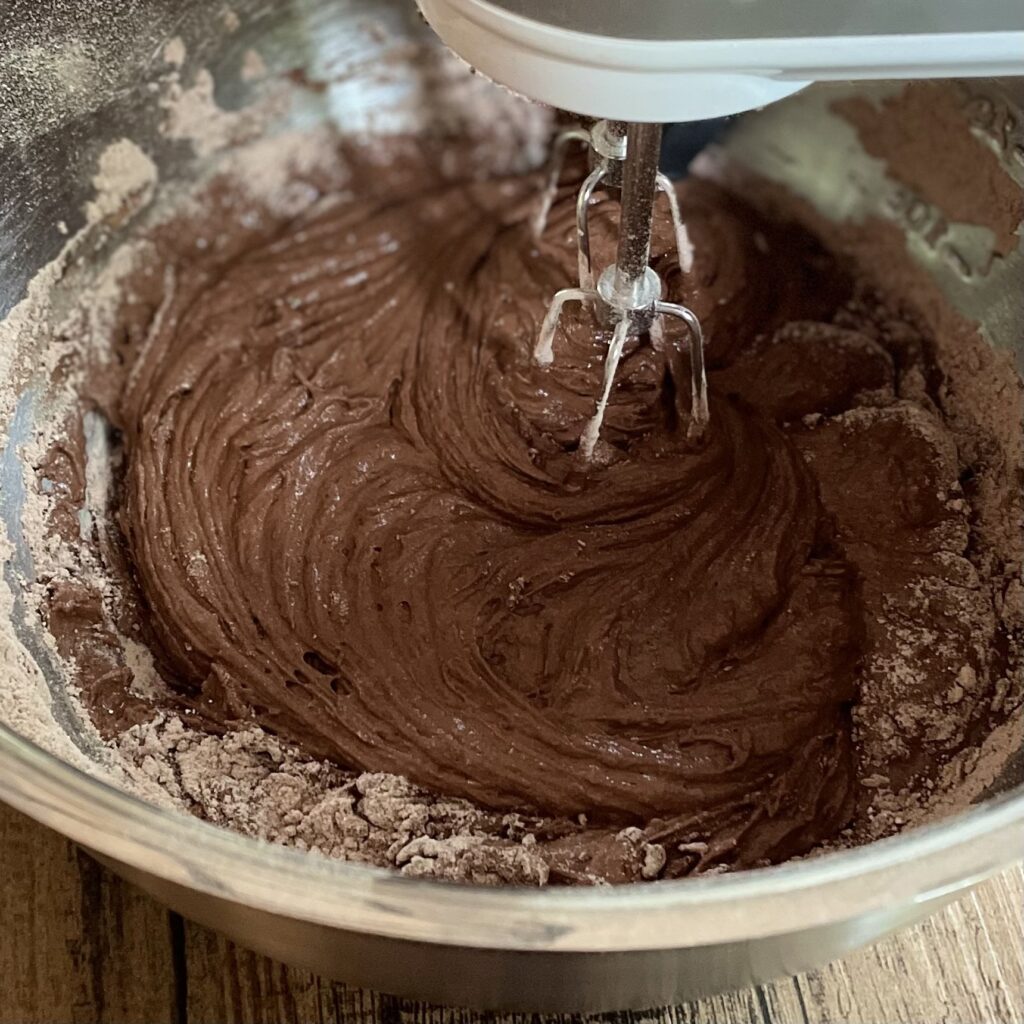
Next, add remaining ingredients except hot coffee. Beat with electric mixer on medium speed for 2 minutes.

Stir in coffee or water with a fork or spoon until well incorporated and blended, batter will be a thin consistency.
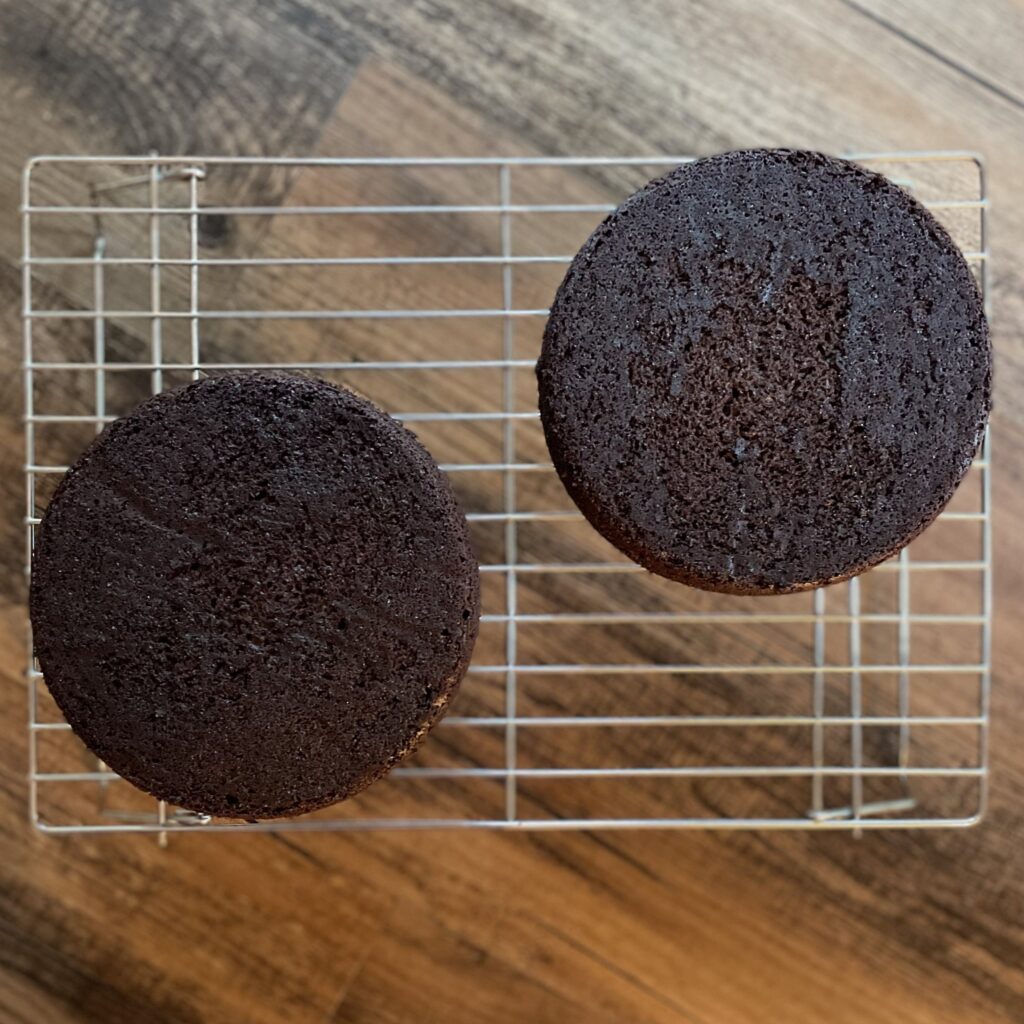
Fill 6-inch pans with approximately 1 3/4 cups batter in each, then bake in preheated oven for 28-32 minutes or until wooden toothpick inserted comes out clean or with a few moist crumbs. After removing from oven, let cool on rack in pans for about 5-8 minutes, then release onto a cooling rack to cool completely. These baked very even, so only slight leveling was needed before frosting.
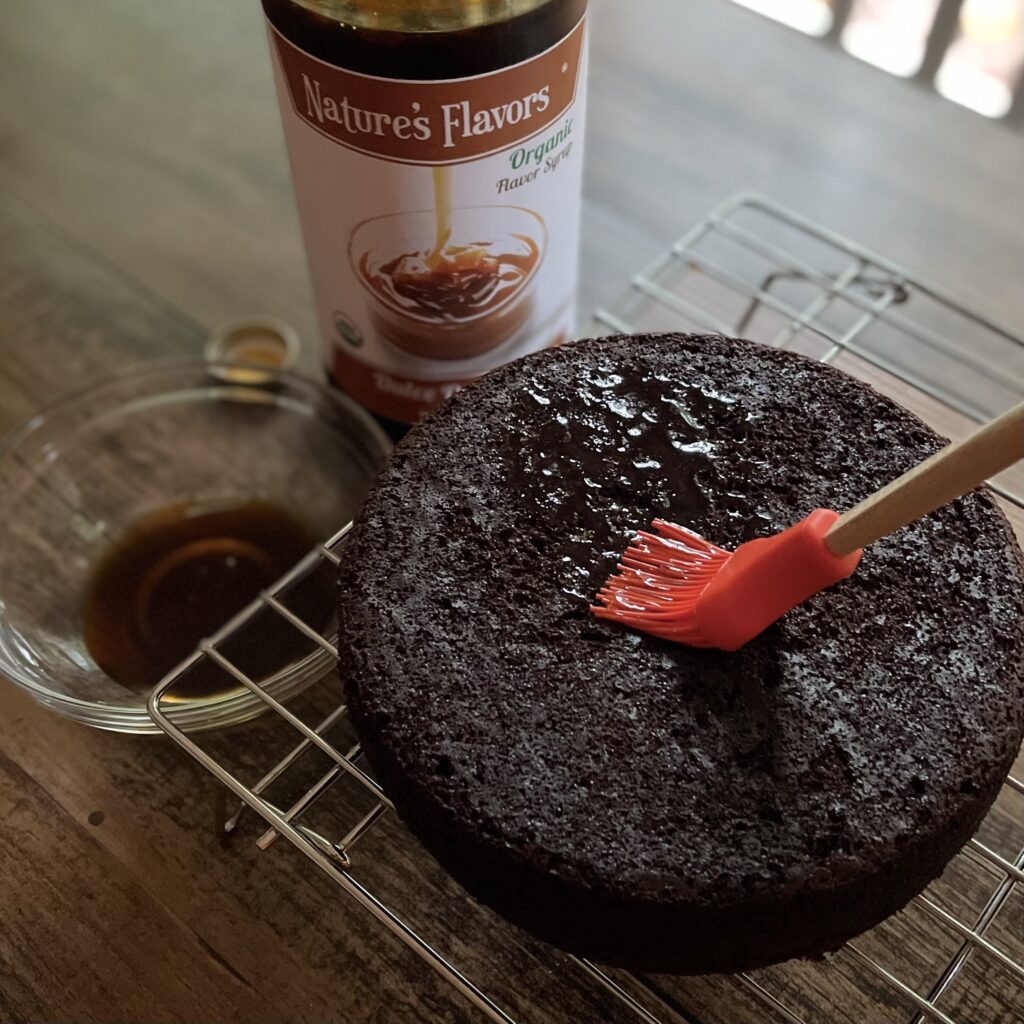
While layers are cooling, brush a coating of Nature’s Flavors organic dulce de leche flavor syrup on top of cake layers for complementary caramel-like flavor boost. (This is optional but adds such a great extra depth of flavor to the chocolate cake.)

To make the espresso buttercream, add softened butter to a large bowl and cream with electric mixer on medium speed for 2-3 minutes, or until light and fluffy. Add powdered sugar 1/2 cup at a time, beating after each addition. Next, scrape down sides of bowl and add espresso extract and beat on medium until well incorporated. Add milk, 1 tablespoon at a time, until desired consistency is achieved.
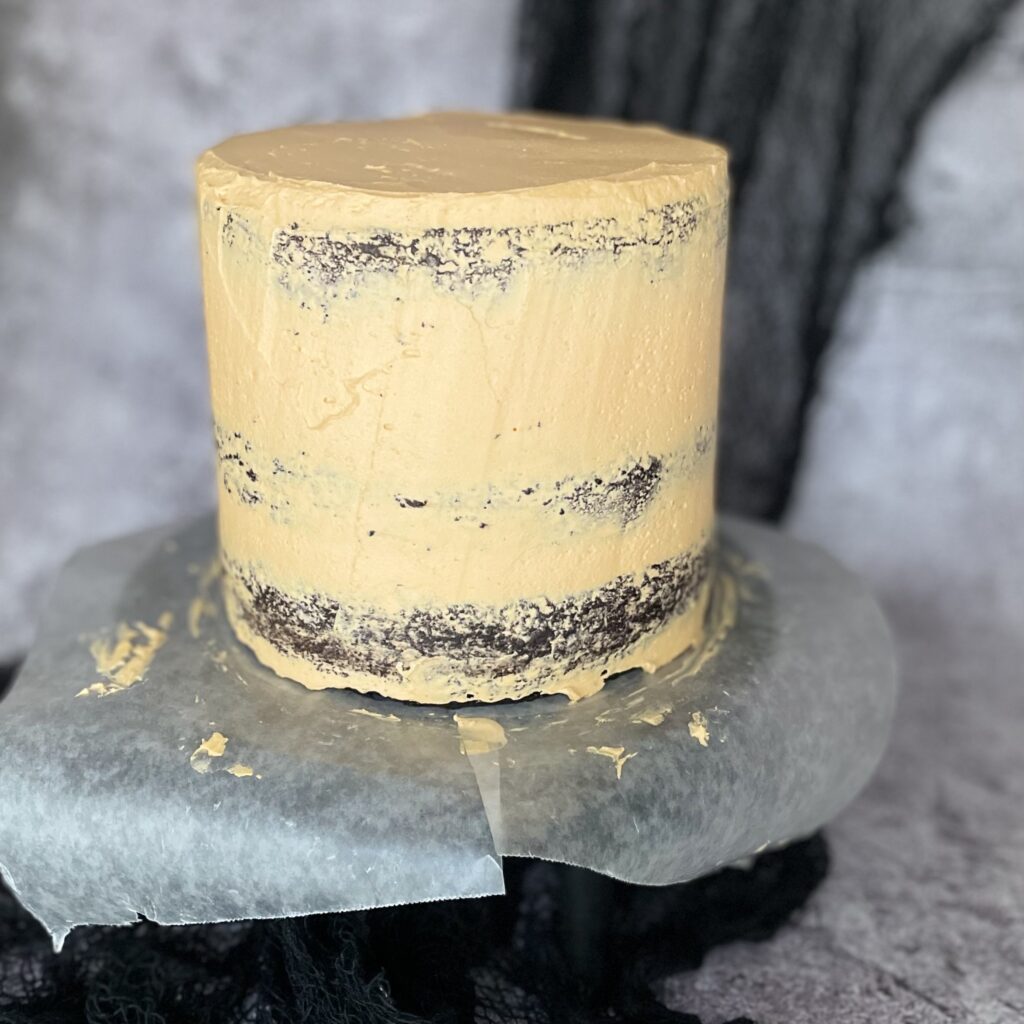
Place waxed paper underneath bottom layer (to prevent mess) and pipe/spread on a layer of buttercream to edges, placing second layer on top and repeating process. Use a frosting spatula to spread frosting on top layer and a crumb coat on sides, then place in the refrigerator for 20 minutes to set before adding final frosting coat.
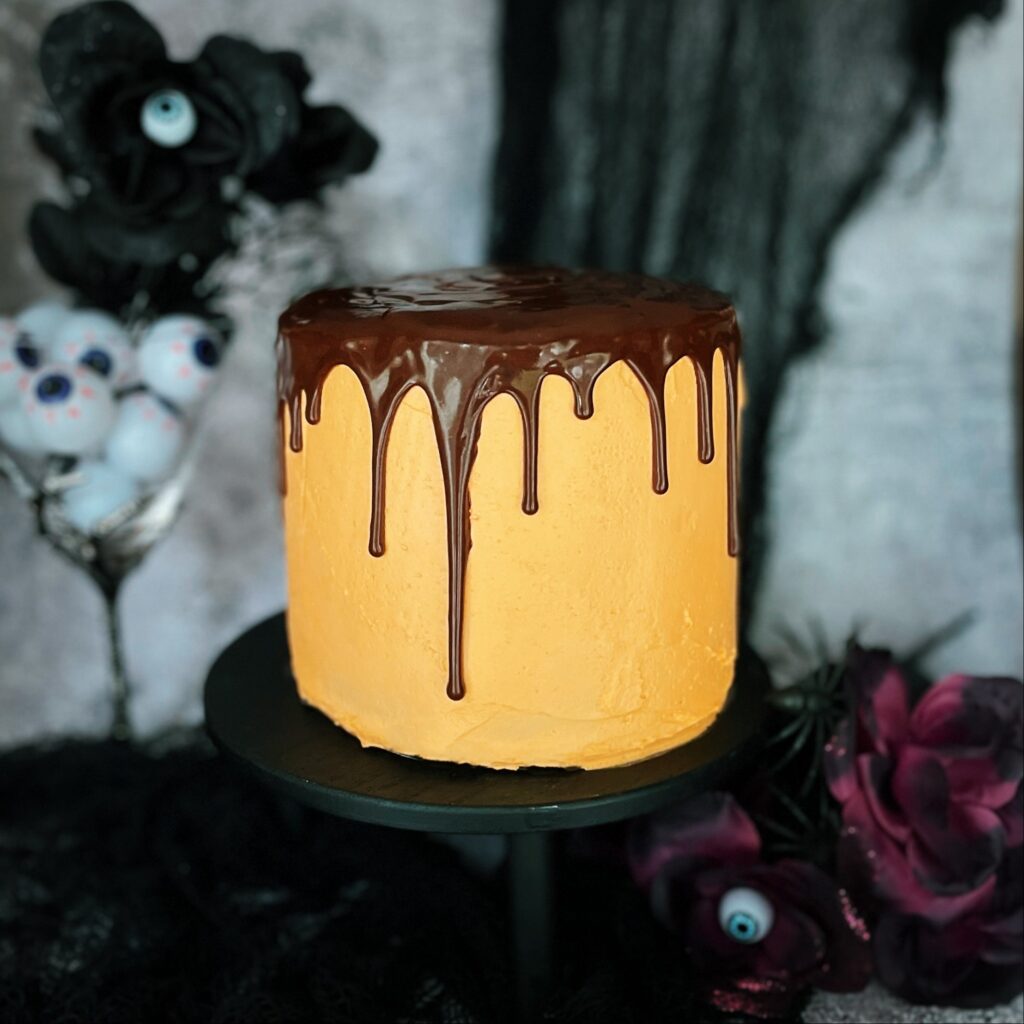
After frosting is set, you can add a chocolate drip on top and sides easily using a can of store-bought chocolate fudge frosting heated in microwave until correct pourable consistency, about 20-25 seconds, stirred well after heated. Start pouring with large spoon in center and work your way to edges of cake, dripping in different amounts to create this fun and tasty effect.
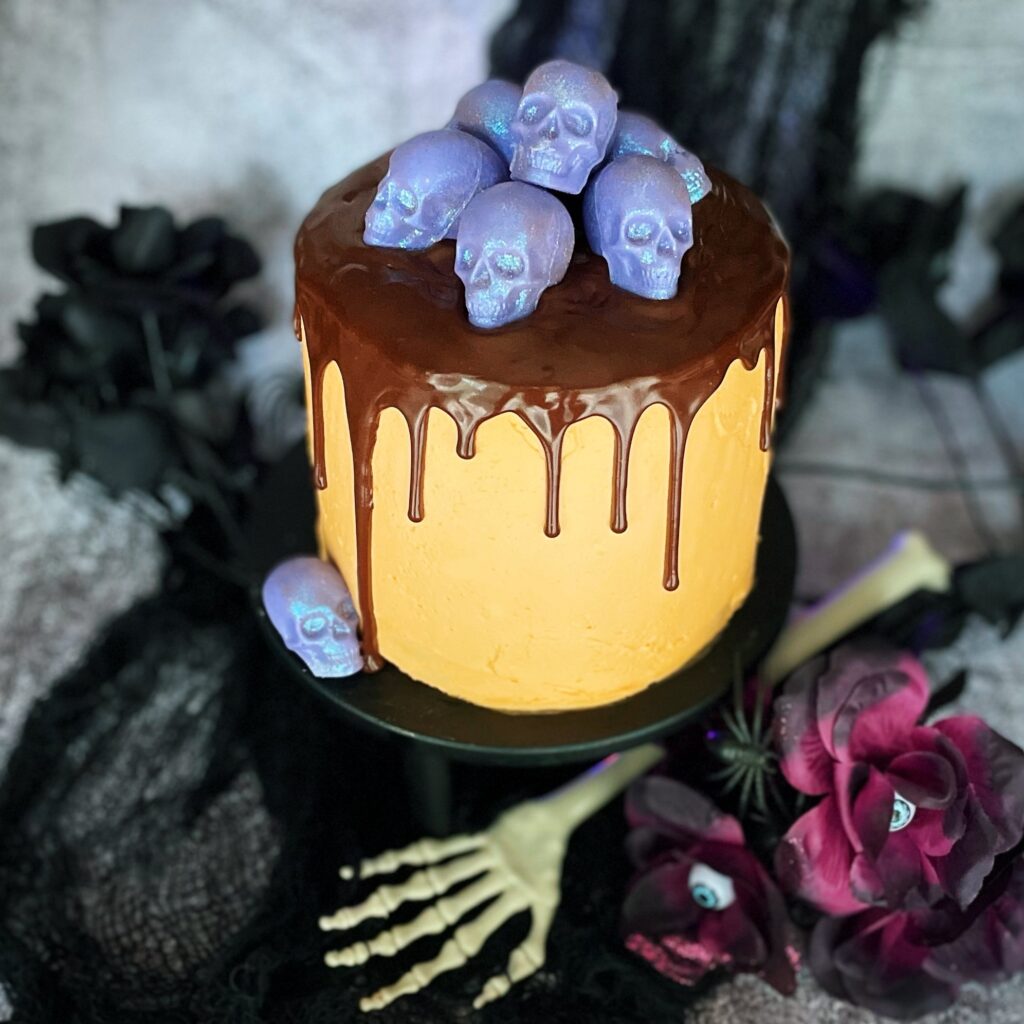
Another optional step for extra spookiness is to make edible chocolate candy skulls to add to the top of the cake. I used white almond bark and added four drops of purple food coloring and brushed with edible glitter for an iridescent magical touch. Find the 3D skull mold I used by clicking HERE.
This moist and delicious cake is definitely one of my all-time favorites and has such depth of flavors that blend wonderfully together for a “magical” taste experience that will “WOW!” your Halloween party guests.
Enjoy this cake with a cold glass of milk, hot cup of coffee or even a dessert wine (for adults.)Happy Halloween! 🎃
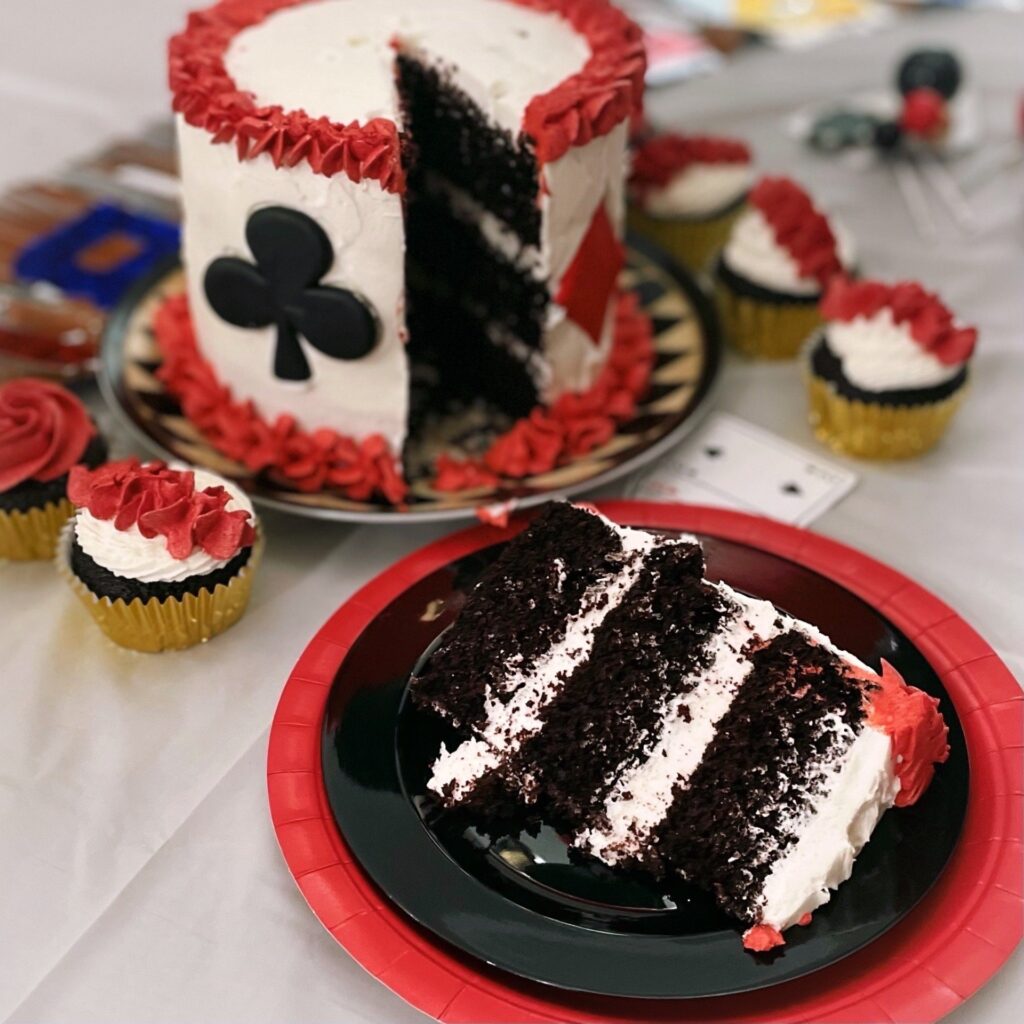
Don’t limit this delicious cake to Halloween! Here’s a fun poker themed black magic cake I made with vanilla buttercream frosting for my son’s 21 birthday party.
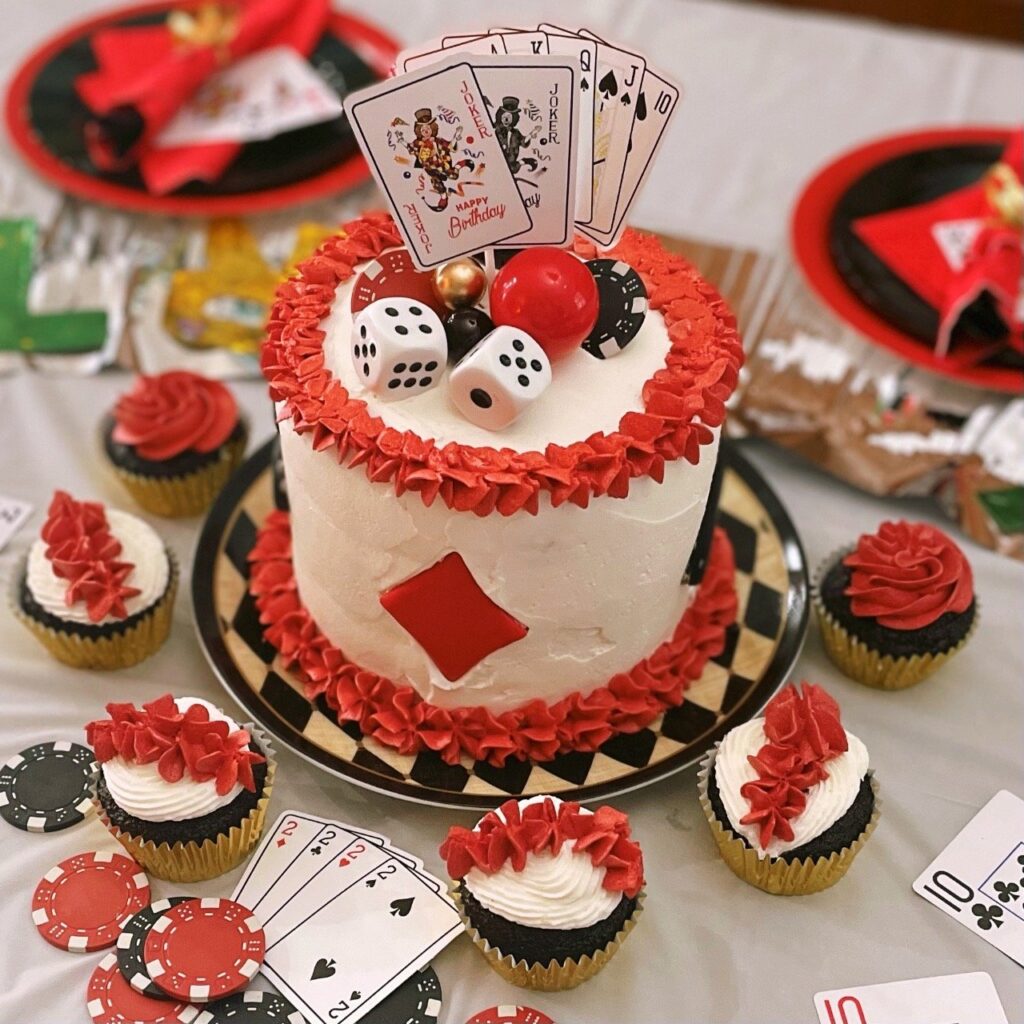
I thought a 21 blackjack party would be fun. I ordered a poker themed cake topper kit with cards on top, poker chips and dice for any easy decoration for the cake.
Enjoy!
💜Julie
Black Magic Cake with espresso buttercream frosting
Ingredients
- 1 3/4 cups all-purpose flour
- 2 cups granulated sugar
- 1 1/2 tsp baking powder
- 2 tsp baking soda
- 1 tsp salt
- 3/4 cup cocoa powder
- 2 large eggs
- 1 cup canned coconut milk full fat (or buttermilk)
- 1/2 cup vegetable oil
- 1 tsp vanilla extract
- 1 cup strong black coffee or 1 cup boiling water over 1 tsp instant coffee
- Optional: 2 tbsp Nature’s Flavors organic dulce de leche flavor syrup for brushing baked cake layers
- 1 cup plant butter softened (or regular dairy butter)
- 4 cups powdered sugar
- 2 tsp Nature’s Flavors organic espresso flavor extract
- 2-3 tbsp plant milk or regular milk
- pinch of salt
Disclaimer:
Nutritional Information is provided as a courtesy only and should be viewed as an estimate. Ingredients can vary with brands and size and Inspiration Apron makes no guarantees to the accuracy of this information.
Instructions
- Preheat oven to 350℉ / 176℃ and grease 3 6-inch pans, lining the bottoms with parchment paper and grease that also. Then dust pans with a light coating of cocoa powder.
- In a large bowl, whisk together dry ingredients (flour, sugar, baking powder, baking soda, salt and cocoa powder.) Next, add remaining ingredients except hot coffee. Beat with electric mixer on medium speed for 2 minutes.
- Stir in coffee or water with a fork or spoon until well incorporated and blended, batter will be a thin consistency.
- Fill 6-inch pans with approximately 1 3/4 cups batter in each, then bake in preheated oven for 28-32 minutes or until wooden toothpick inserted comes out clean or with a few moist crumbs.
- After removing from oven, let cool on rack in pans for about 5-8 minutes, then release onto a cooling rack to cool completely. These baked very even, so only slight leveling was needed before frosting.
- While layers are cooling, brush a coating of Nature’s Flavors organic dulce de leche flavor syrup on top of cake layers for complementary caramel-like flavor boost. (This is optional but adds such a great extra depth of flavor to the chocolate cake.)
- To make the espresso buttercream, add softened butter to a large bowl and cream with electric mixer on medium speed for 2-3 minutes, or until light and fluffy.
- Add powdered sugar 1/2 cup at a time, beating after each addition. Next, scrape down sides of bowl and add espresso extract and beat on medium until well incorporated. Add milk, 1 tablespoon at a time, until desired consistency is achieved.
- To frost cake, you can place waxed paper underneath bottom layer (to prevent mess) and pipe/spread on a layer of buttercream to edges, placing second layer on top and repeating process.
- Use a frosting spatula to spread frosting on top layer and a crumb coat on sides, then place in the refrigerator for 20 minutes to set before adding final frosting coat.
- Optional: After frosting is set, you can add a chocolate drip on top and sides easily using a can of store-bought chocolate fudge frosting heated in microwave until correct pourable consistency, about 20-25 seconds, stirred well after heated. Start pouring with large spoon in center and work your way to edges of cake, dripping in different amounts to create this fun and tasty effect.